Creating an Azure Storage Account
An Azure Storage Account is required to host the VIM file and the Parquet files which are loaded into Microsoft Power BI. The same Azure Storage Account can be used to store the VIM files for all of your VIM Enterprise projects. To configure a VIM Enterprise project, you will need the Blob SAS URL for the Azure Storage Account.
To create an Azure Storage Account, you must have access to a Microsoft Azure Resource Group. You must also have sufficient privileges in Azure to create additional resources.
On this page, we will be configuring the following items:
-
Storage account service — manages the storage resources
-
Storage account firewall — controls who can access to the storage account
-
Resource sharing (CORS) — manages access to the stored VIM files
-
Container — volume for storing VIM files
-
Shared access tokens — defines access restrictions for the storage container
If you are not familiar with Microsoft Azure, contact your IT department for assistance or have them complete this procedure for you.
Creating a Storage Account
-
Log in to Microsoft Azure and go to your Resource group Home page.
-
On the Resource group page, click Create.

-
On the Marketplace page type
Storage accountin the search field and press Enter. -
From the search results list, under Storage account, click the Create drop-down and choose Storage account.

-
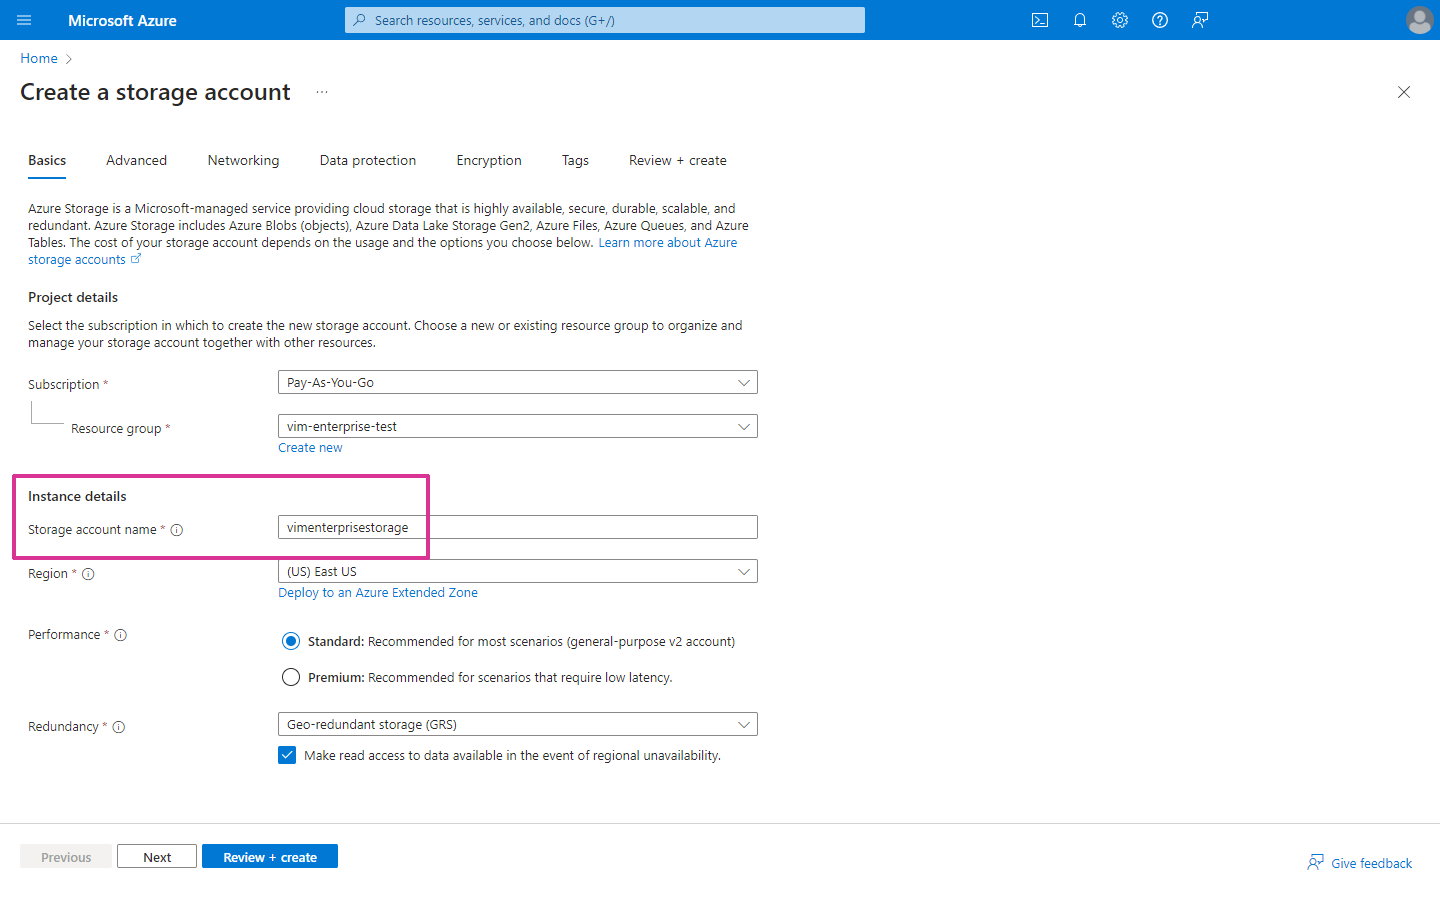
On the Create a storage account page, under Project details, make sure your Resource group is selected in the Resource group field.
-
Under Instance details, type a name in the Storage account name field.
-
Review the other settings on the Basics panel and modify them if necessary, based on your own requirements and IT policies.
-
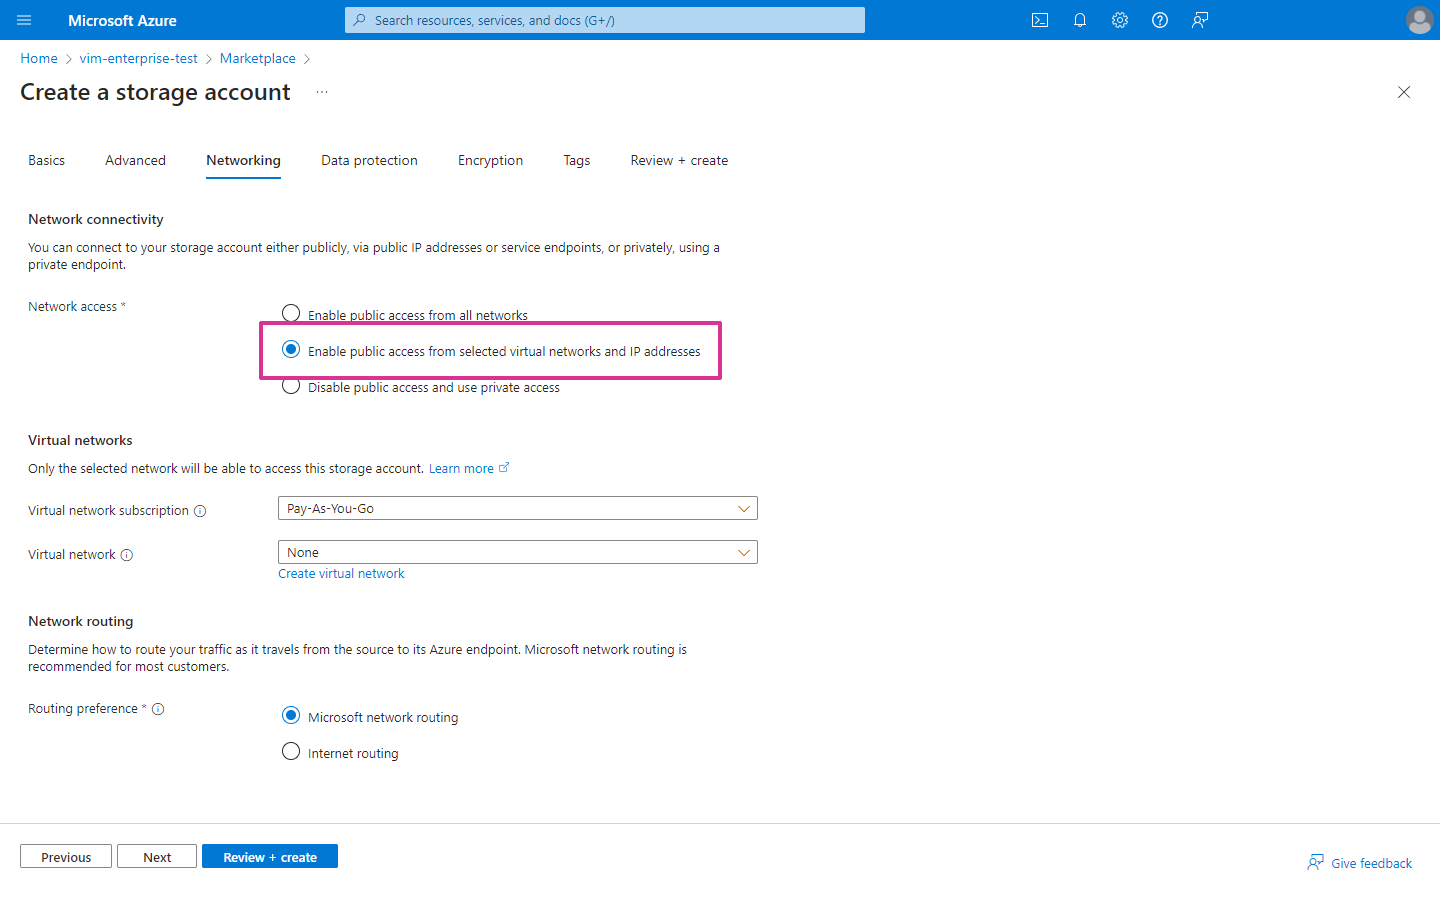
On the Create a storage account page, click on the Networking tab.
-
On the Networking panel, under Network access, select Enable public access from selected virtual networks and IP addresses. Power BI requires access to the VIM files in order to display the 3D geometry data. This setting will control access to the storage account on a per-IP basis, but you might need to modify these settings based on your own requirements and IT policies.
-
Click Review + create, review the list of settings, and then click Create. A message saying "Your deployment is complete" will appear when the storage account has been created.
-
On the Deployment page, click Go to resource.
Configuring a Storage Account Firewall
-
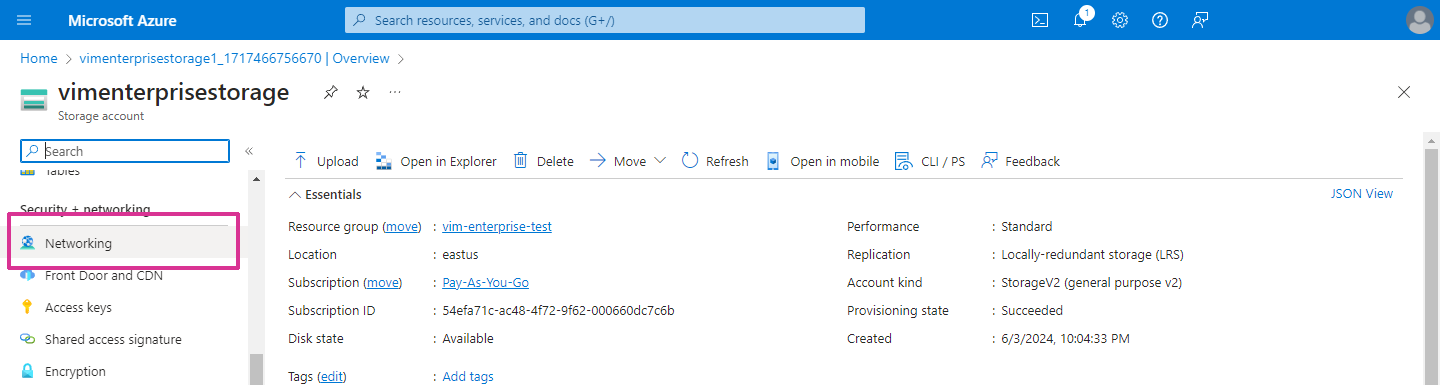
On the Storage account page, in the left panel under Security + networking, click on Networking.
-
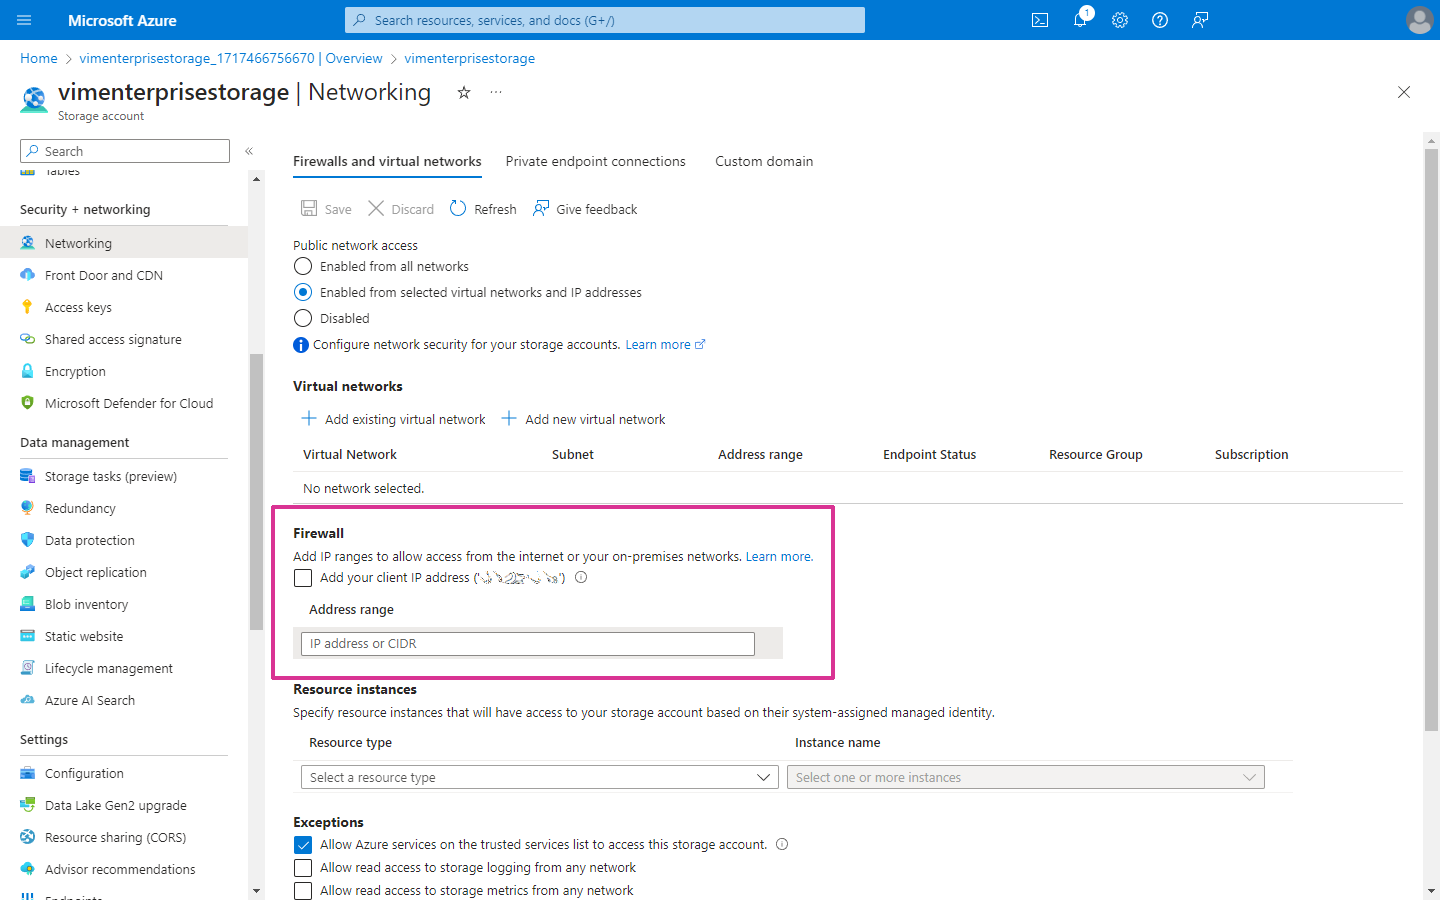
On the Storage account Networking page, under Firewall, type your IP address in the Address range field, and click Save. You can add additional IP addresses if you want to share your Power BI reports.
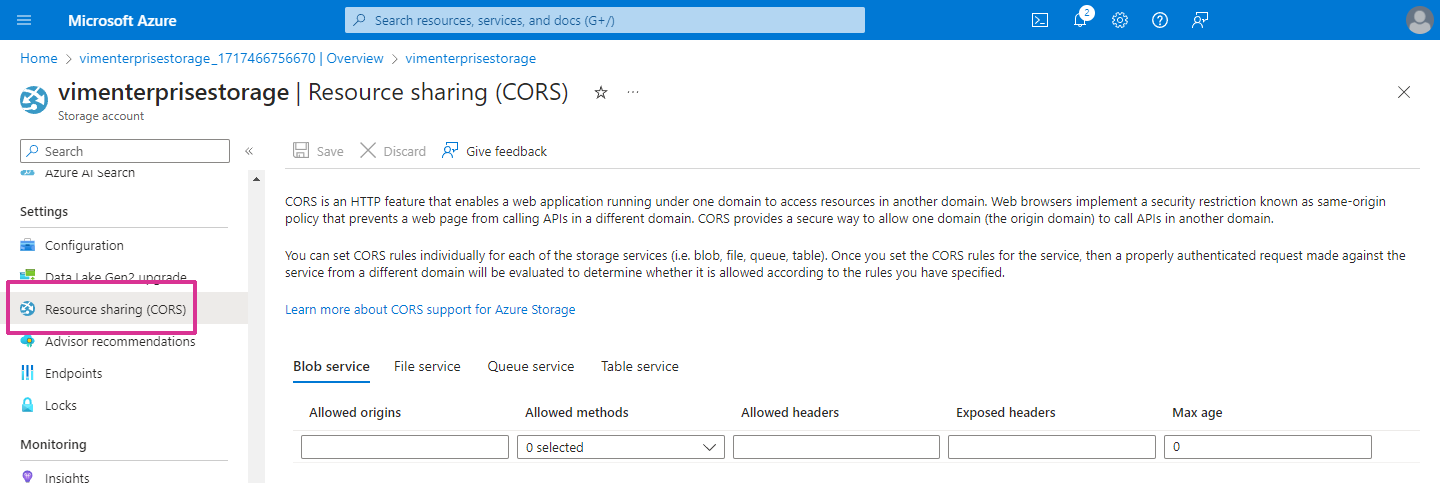
Configuring Resource Sharing (CORS)
-
On the Storage account page, in the left panel under Settings, click on Resource sharing (CORS).
-
On the Resource sharing (CORS) page, define the settings below. For more information, refer to the Microsoft Online Help for Azure Resource sharing.
-
Allowed origins - type
* -
Allowed methods - click the drop-down menu and enable GET and HEAD
-
Allowed headers - type
* -
Exposed headers - type
Content-Range,* -
Max age - type
5
- Click Save. A "Successfully saved CORS rules" message will appear when the configuration has been saved.
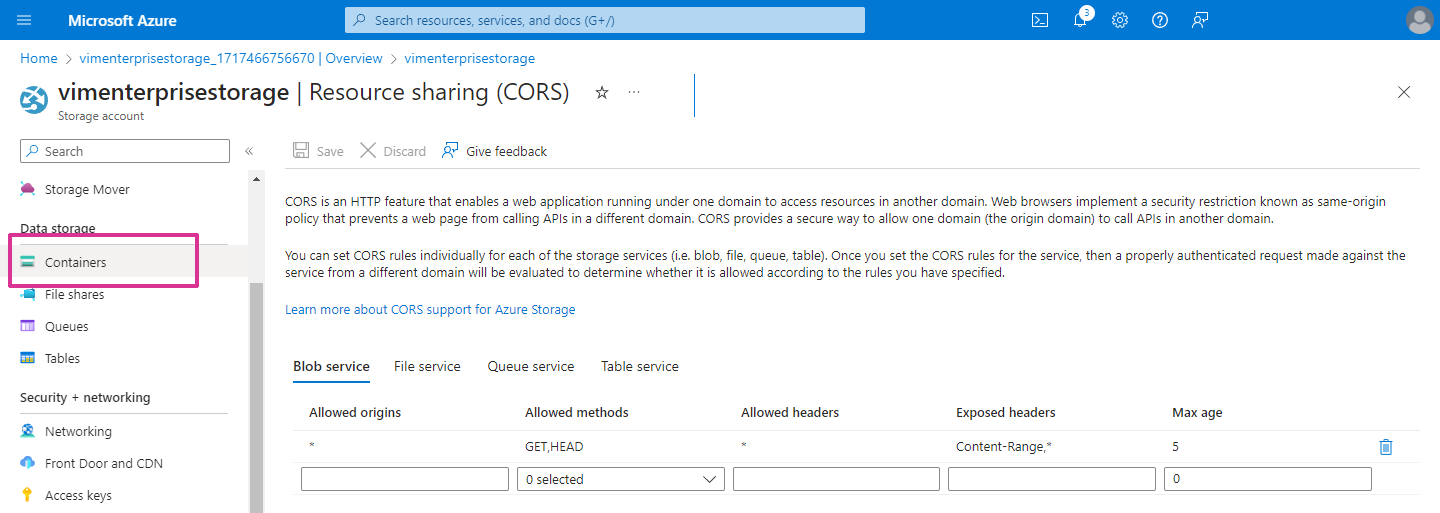
Creating a Container
-
On the Storage account page, in the left panel under Data storage, click on Containers.
-
On the Containers page, click Container.

-
In the New container panel, type a container Name.
-
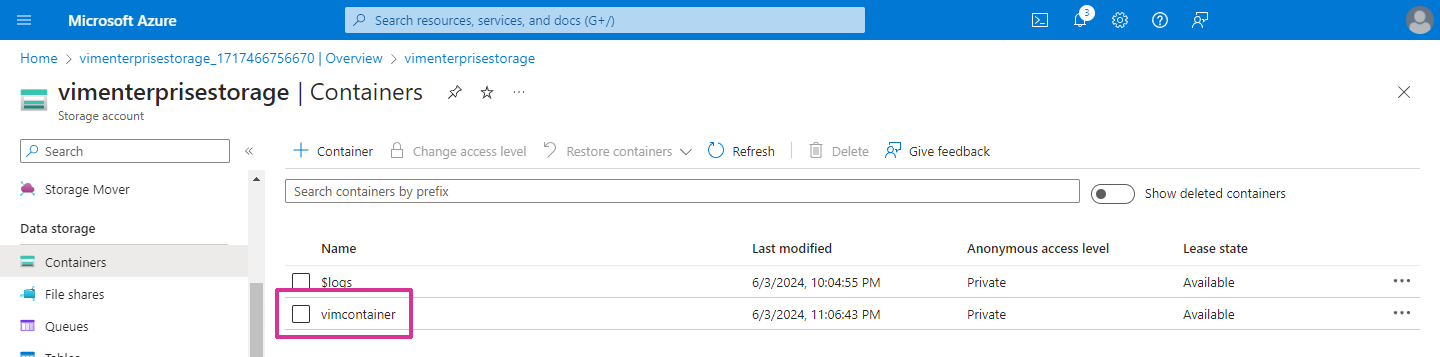
At the bottom of the New Container panel, click Create. A "Successfully created storage container" message will appear when the container has been created, and the container is listed on the Containers page.
-
In the containers list, click on the name of the container you just created.
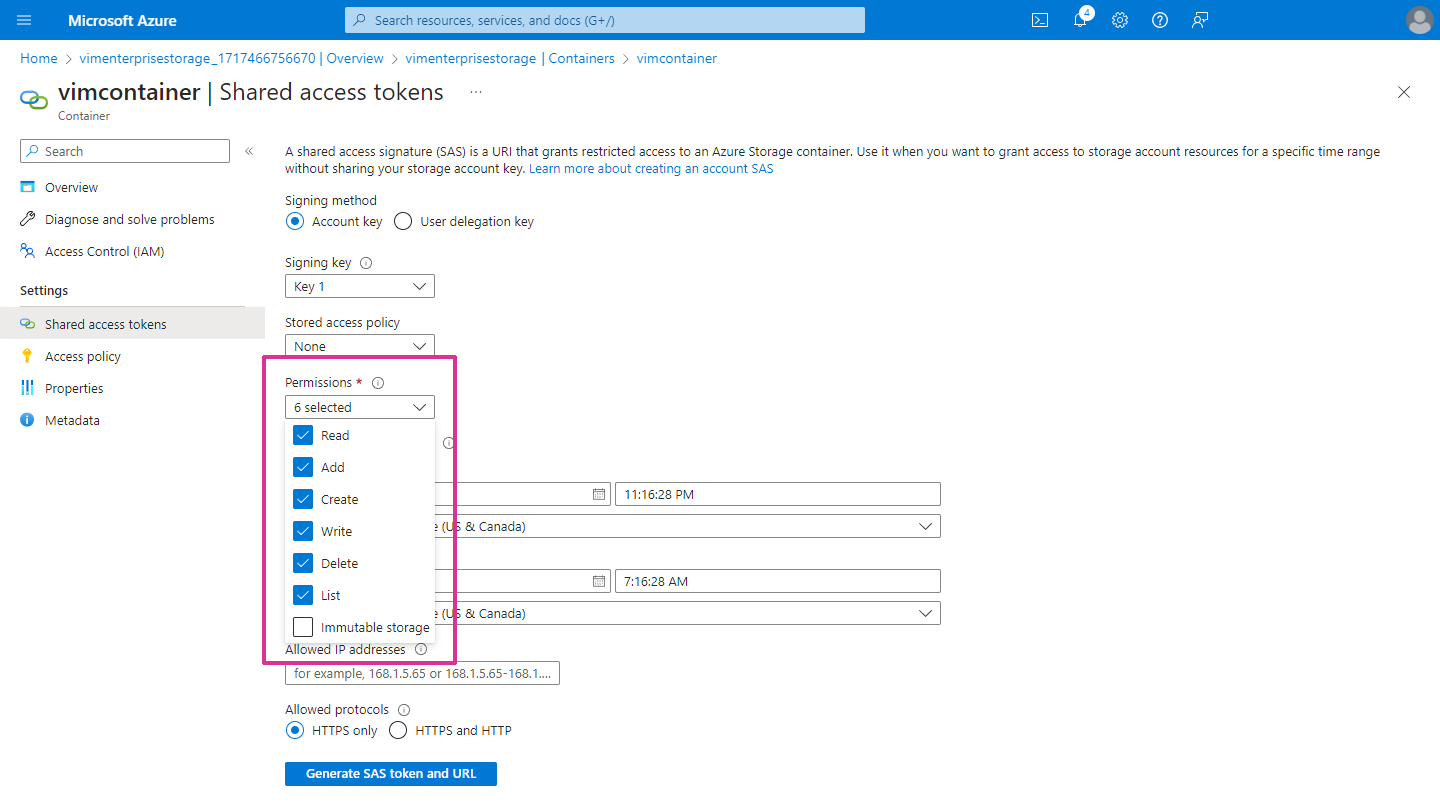
Creating Shared Access Tokens
- On the Container page, in the left panel under Settings, click Shared access tokens.

-
On the Shared access tokens page, click the Permissions drop-down menu and enable Read, Add, Create, Write, Delete, and List.
-
Define the Start and Expiry dates and time zones as required.
-
Click Generate SAS token and URL. The Blob SAS token and Blob SAS URL fields are displayed at the bottom of the Container page.
-
Click the Copy icon on the right side of the Blob SAS URL field. This string is required for the VIM Enterprise project settings. You can save this string to a text file or you can paste it directly into your VIM Enterprise project settings.

Getting an Access Key for Power BI
To successfully refresh your VIM Power BI reports, you will need to copy the Access Key into either Power BI Desktop or into your Power BI service's data source. Please follow the steps below to obtain the Access Key from your Azure Storage Account.
-
Navigate to the Azure Storage Account you are using for your VIM Enterprise projects.
-
Go to "Security + networking" > "Access keys"
-
Press "Show" and copy one of the access keys to your clipboard.
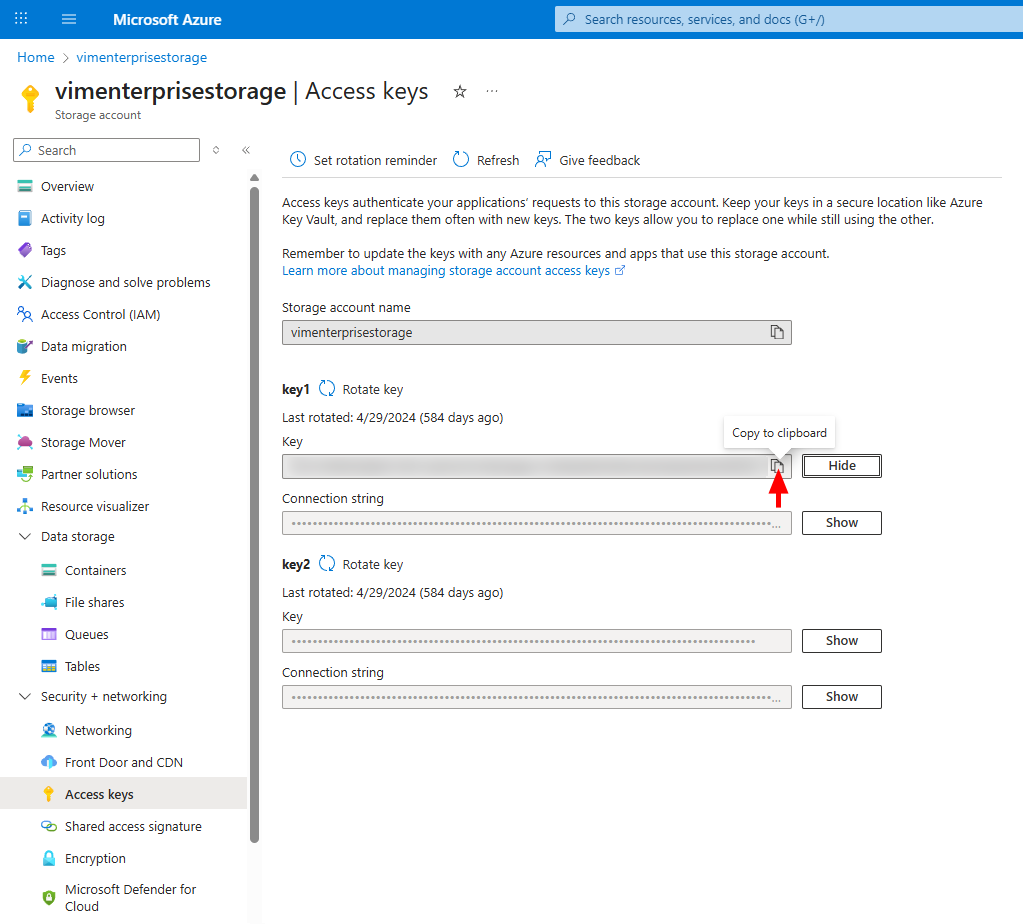
-
Paste your access key to authenticate your data source in Power BI.