Creating a Project using ACC
Before creating a VIM Enterprise project using Autodesk Construction Cloud, you will require access to your ACC projects. You will also need to have an Azure Storage Account configured.
You must be signed in to Autodesk Construction Cloud each time you run a VIM Enterprise ACC project. You can sign in or out on the ACC App panel in VIM Enterprise.
Creating an ACC Project
-
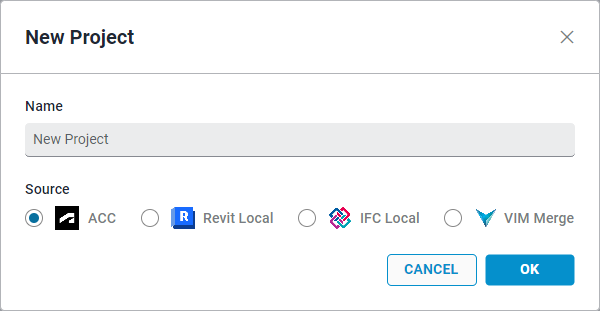
In VIM Enterprise, on the Projects tab, click New Project.
-
In the New Project dialog, type a Name for the project.
-
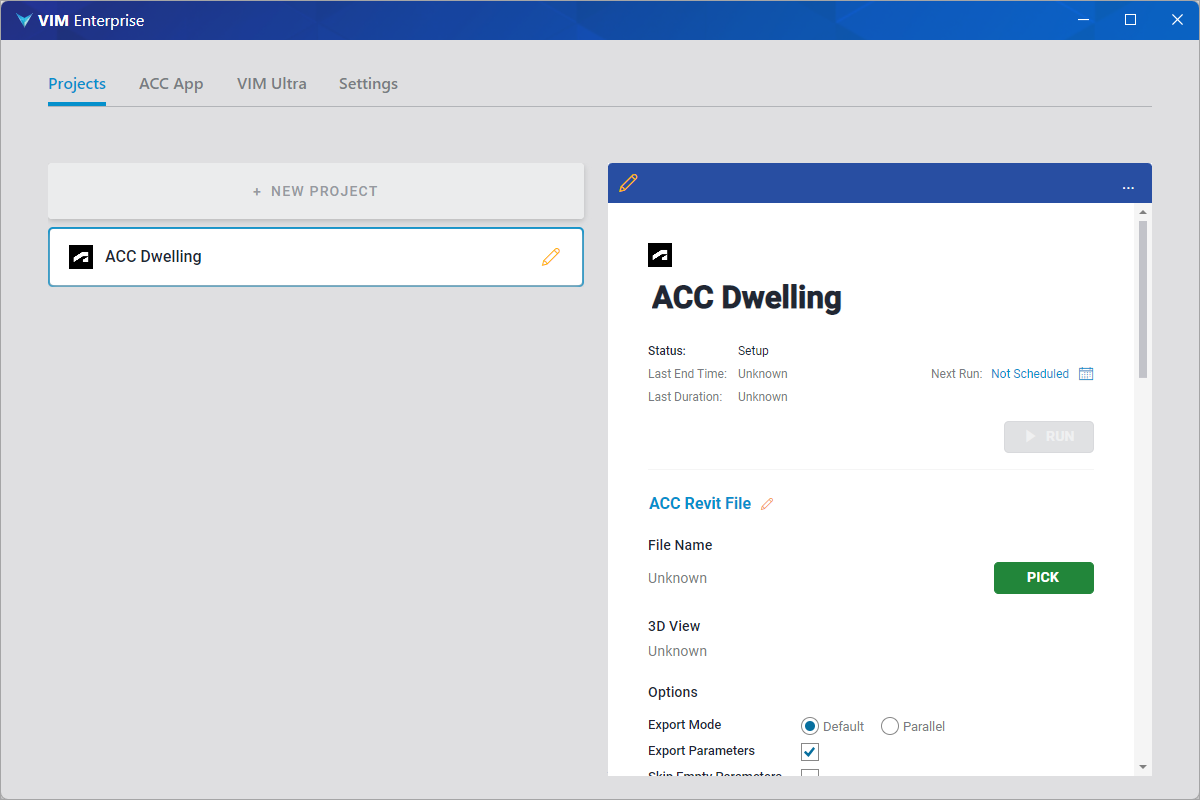
Under Source, select ACC and click OK. The new project name is listed on the left panel and the project settings are displayed.
-
On the project settings panel, click on PICK.
-
In the Pick ACC Revit File dialog, choose an ACC Revit File, select a 3D View, click Done and then click Save.
importantYour Autodesk user account will need the "Project Administrator" permission in that ACC project to see the Revit files in that list.
-
Under Options, define the following settings as required:
-
Export Mode — Enabling Parallel mode may significantly decrease the export times of larger projects. Note that additional Autodesk Flex Tokens will be required when using the this option.
-
Export Rooms — Exports all the rooms in the document.
-
Export Area Info — Exports all the area information in the document.
-
Export View Sheet Set Info — Exports all the view sheet set information in the document.
-
Export Parameters — Enabled by default. Exports all element parameters from the ACC Revit project. If unchecked, no element parameters are exported, only the geometry data.
-
Skip Empty Parameters — Skips all empty parameters to streamline the export process.
-
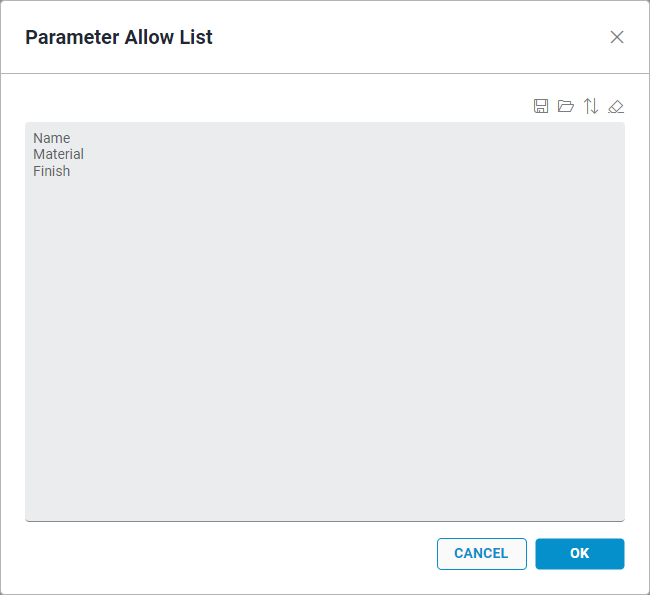
Parameter Allow List — Enables you to define a list of parameters to include in the export. This can save time when exporting larger projects. The Parameter Names must match the Family, Instance, or Type parameter names in the Revit project. You can save parameter lists as text files and load lists from saved text files.
-
-
Scroll down to the VIM File Path field, click the folder icon, select a folder in which to store the exported VIM file, and click Save.
-
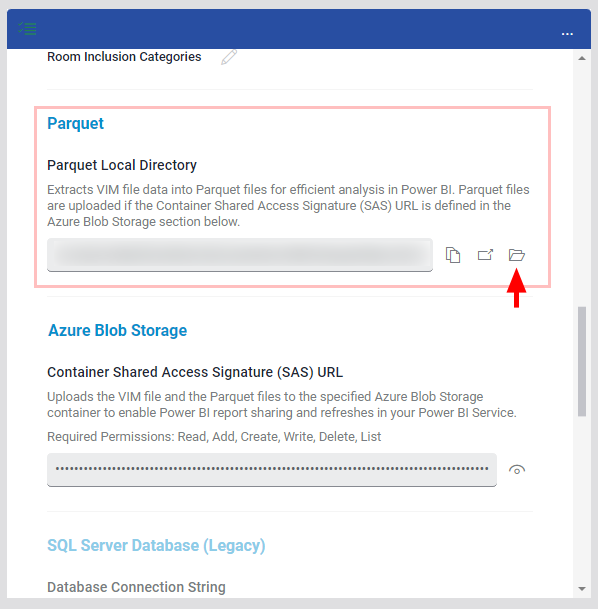
Scroll down to the Parquet section. Click on the folder icon to select a folder in which to store the processed Parquet files then click Save.
-
Obtain the Azure Blob SAS URL required for the next step and copy it to the Windows clipboard. The Blob SAS URL is generated on the Microsoft Azure Container page. See Creating Shared Access Tokens.
noteIf your IT department created the Azure Storage Account, you will need to contact them to obtain the Blob SAS URL
-
On the project settings panel, right-click in the Container Shared Access Signature (SAS) URL field and choose Paste. The same SAS URL can be used for all of your VIM projects. Important: this SAS URL has an expiry date and must be refreshed based on your chosen expiry date.

-
Click Save.
-
Scroll to the top of the project settings panel and click Run.
When complete, the project Status will say "Done!", and a green checkmark will be displayed beside the project in the projects list.
The fields in the Power BI section of the project settings are populated automatically from the Azure Blob Storage settings.