Configuring ACC App Bundles
This procedure is only required if you are using Autodesk Construction Cloud (ACC) as a project source for VIM Enterprise.
To connect VIM Enterprise to ACC, you will need to create an ACC application and then add it as a custom integration in your ACC account. The same ACC application can be used for multiple projects and multiple users. To create an ACC application, you must have Account Administrator privileges with your ACC organization. These procedures are typically performed by your IT department or your ACC administrator.
NOTE: VIM Enterprise uses Autodesk's Design Automation services, so you will need Autodesk Flex Tokens to use VIM Enterprise with ACC.
Step 1: Create an ACC Application
-
Log on to Autodesk Platform Services and click on Go to my apps.
-
On the Applications page, click Create application.
-
In the Create Application dialog, type a Name for your application, select Traditional Web App, and click Create.
-
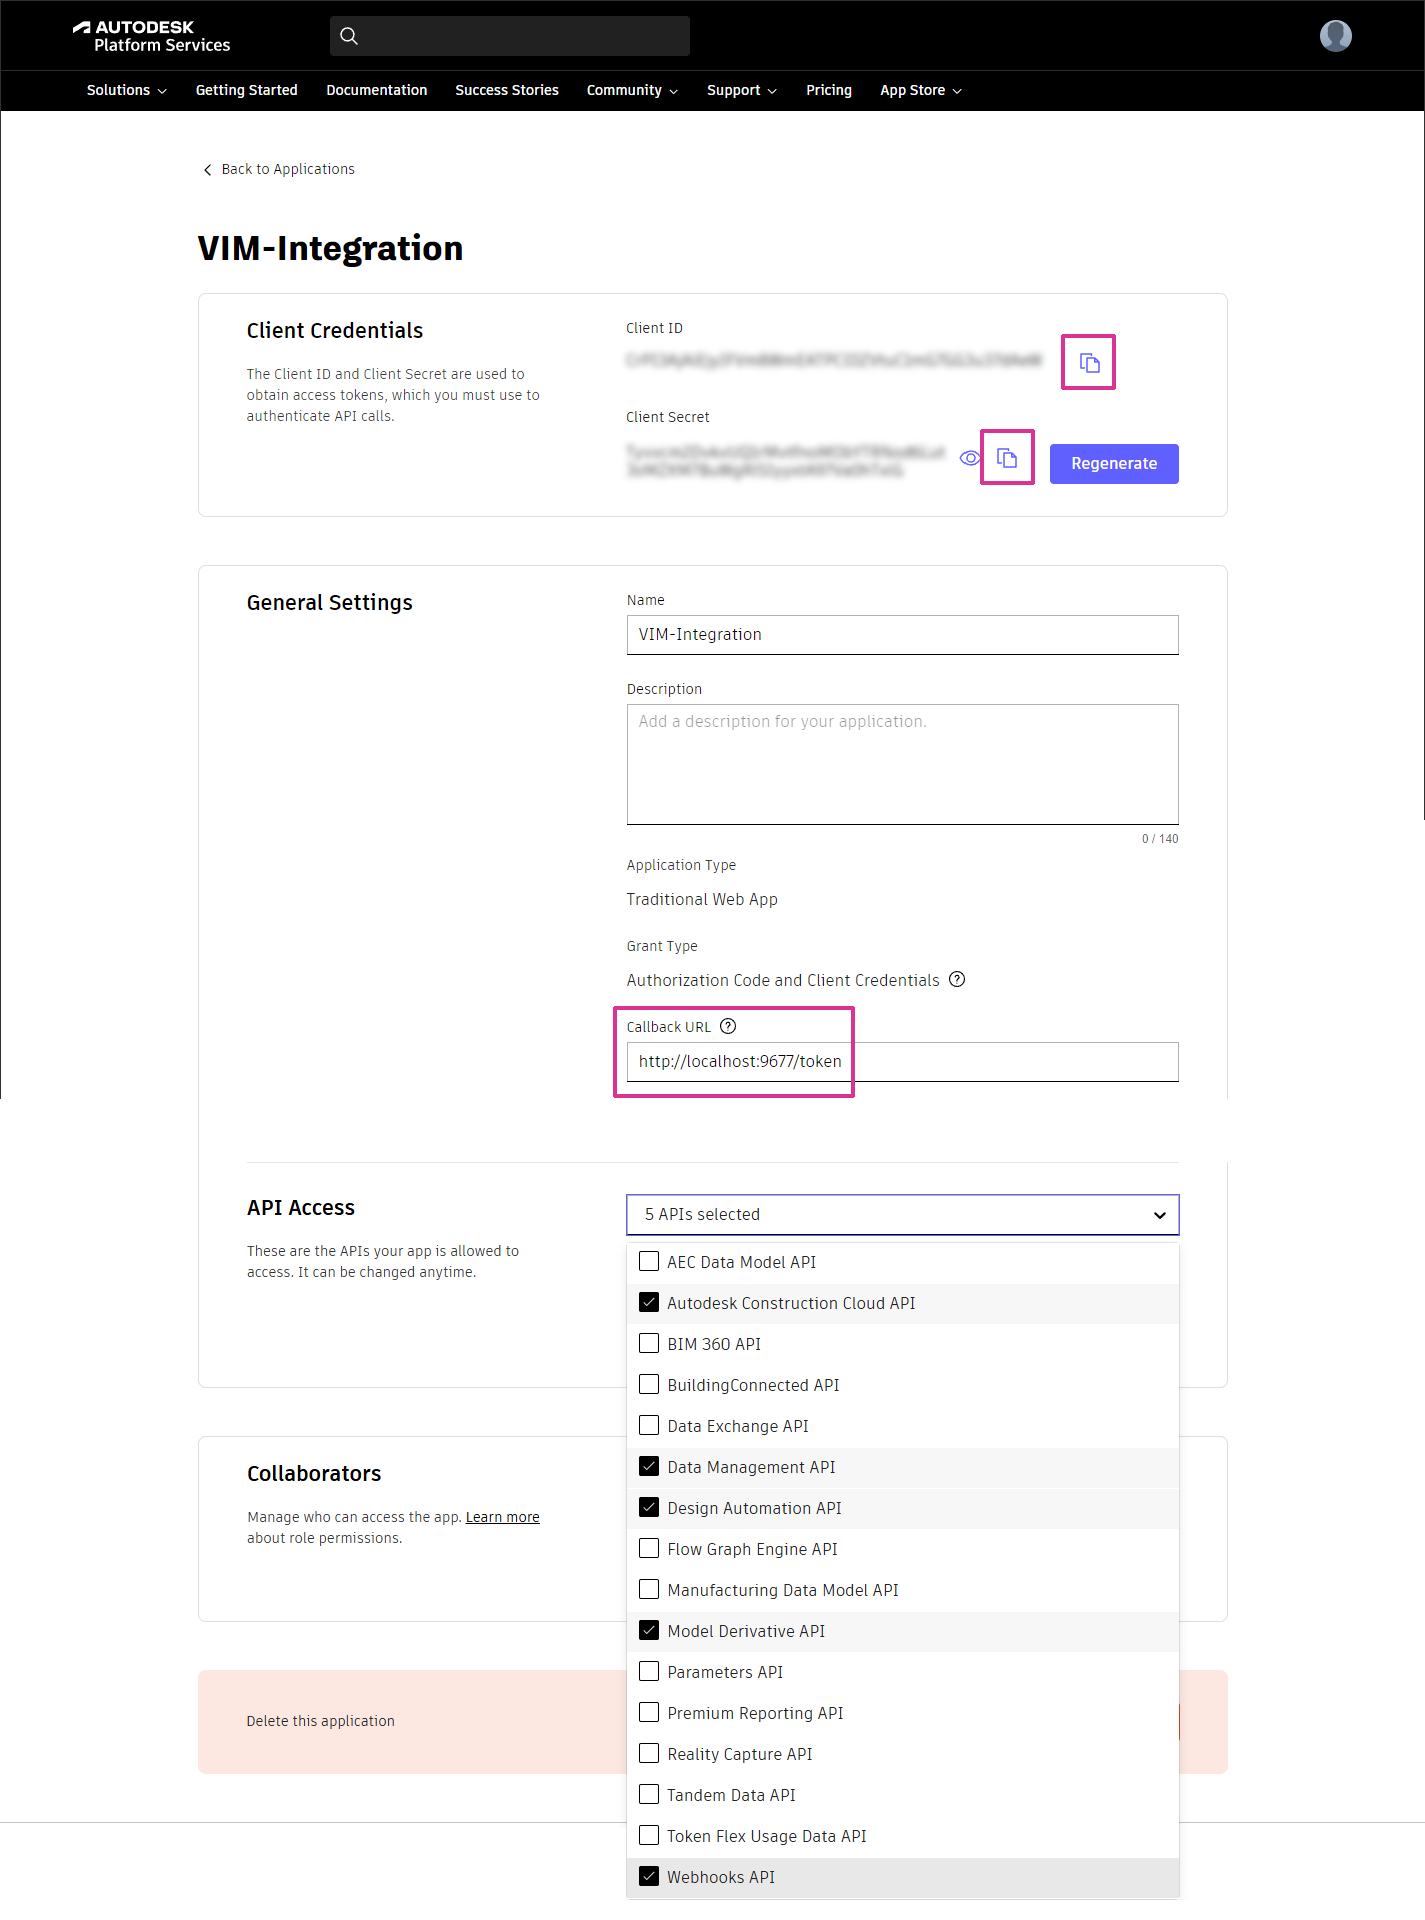
On the application page, under General Settings, type
http://localhost:9677/tokenin the Callback URL field. This URL is used as part of the authentication process with VIM Enterprise. -
In the API Access section, click the drop-down list and enable the following APIs:
- Autodesk Construction Cloud API
- Data Management API
- Automation API
- Model Derivative API
- Webhooks API
-
Click Save changes.
-
Leave this web page open or copy each of the fields below and save them in a text document. You will need the Client ID for the procedure Step 2: Add the ACC app as a custom integration (below). You will need the fields below for the procedure Step 3: Configure the ACC App.
- Client ID
- Client Secret
- Callback/Redirect URL
Step 2: Add the ACC Application as a custom integration
-
Log on to Autodesk Construction Cloud.
-
On the ACC welcome page, click on Account Admin in the top-left corner.
-
In the left panel, click on Custom Integrations.
-
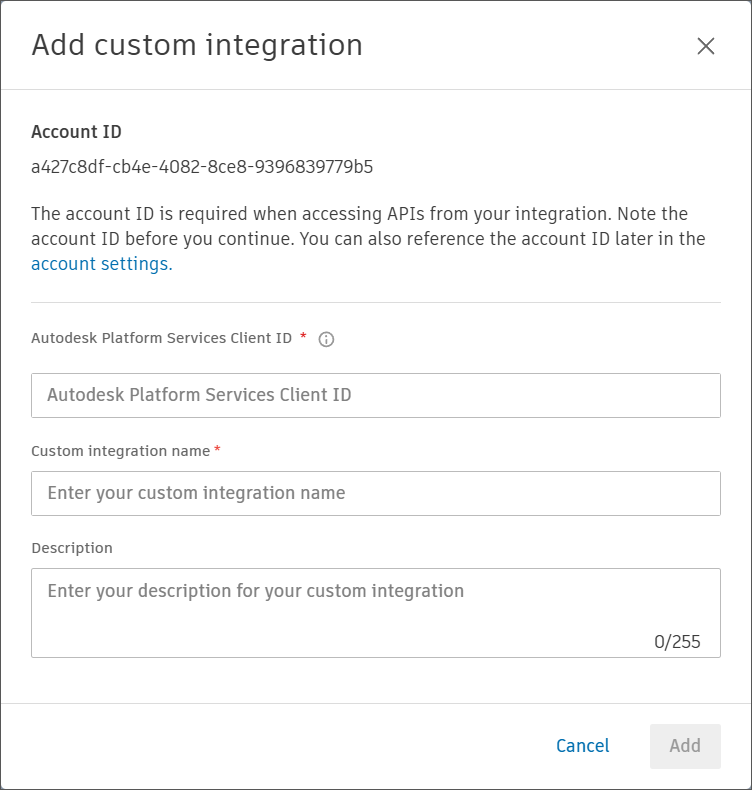
On the Custom integrations page, click on Add custom integration.
-
Get the Client ID from the procedure above, Step 1: Create an ACC Application and paste it into the Autodesk Platform Services Client ID field in the Add custom integration dialog.
-
Type a name in the Custom integration name field, and add a Description if desired.
-
At the bottom of the Add custom integration dialog and click Add. A message appears saying the app has been added.
Step 3: Configure the ACC App
The ACC connection settings are on the ACC App panel in VIM Enterprise and only need to be configured once.
-
In VIM Enterprise, go to the ACC App panel and click ACC APP SETUP.
-
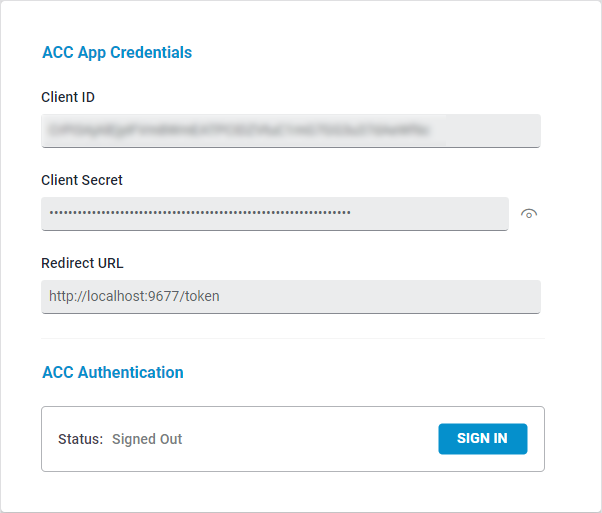
Obtain the connection settings required for VIM Enterprise to connect to Autodesk Construction Cloud. The Client ID, Client Secret, and Callback/Redirect URL are required to configure the ACC App in VIM Enterprise.
- If your IT department or ACC administrator configured the ACC application, you will need to contact them to get the connection settings.
- If you configured the ACC application, in a web browser, go to Autodesk Platform Services, click on Go to my apps, and then click on the application you created in Step 1: Creating an ACC Application.
-
Paste the Autodesk Construction Cloud connection settings into corresponding fields on the VIM Enterprise ACC App Credentials panel.
-
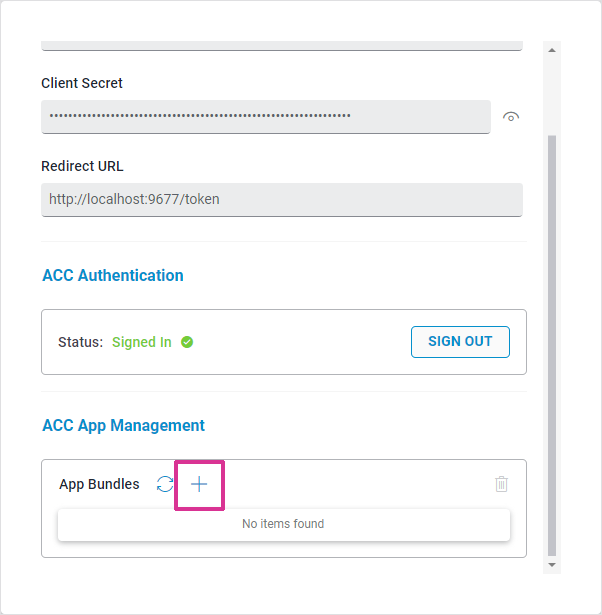
Click Save and then click on Sign In.
-
When prompted to authorize the ACC application, click Allow. This authorization provides secure access to your ACC Revit projects.
-
When the sign in to ACC is complete, on the VIM Enterprise ACC App panel, under ACC App Management, click on the "+" icon beside App Bundles to upload the app bundle specific to your version of Revit (e.g., Revit 2024). An app bundle contains the VIM Revit add-ins required to run on the Autodesk Construction Cloud platform. You must upload an app bundle for each version of Revit you will be using. App bundle archives for all of the supported Revit versions are included with the VIM Enterprise installation.
-
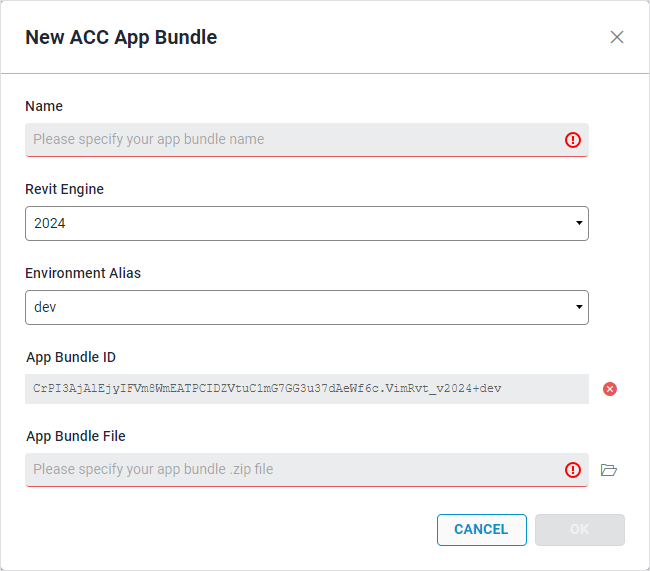
In the New ACC App Bundle dialog, type a Name.
-
Click the Revit Engine drop-down menu and select the Revit version for the app bundle.
-
Click the Environment Alias drop-down list and choose an alias. The Environment Alias allows you to apply different tags to your App bundles in case you are developing your own apps using the VIM SDK.
-
Click the folder icon beside the App Bundle File field.
-
In the Choose App Bundle dialog, select the archive that corresponds to your version of Revit, click Open, and then click OK. The App Bundle is added to the item list.
noteThe VIM Enterprise installer copies the app bundle archives to:
%USERPROFILE%\AppData\Local\VIM\VIM Enterprise\Bundles\