Creating an Azure SQL Database
To create an Azure SQL database, you must have access to a Microsoft Azure Resource group. The same Resource Group can be used for the Azure SQL database and the Azure Storage Account. The Resource group acts as a container for the various resources required to create and manage SQL databases. You must also have sufficient privileges in Microsoft Azure to create additional resources.
The following Azure resources are required for an SQL database:
- SQL Server — manages the SQL databases and the network access controls
- SQL Elastic pool — enables resource sharing between multiple databases that require resources at different times. A separate database is required for each VIM Enterprise project, but the same elastic pool can be used for all of your databases.
- Database Firewall — controls who can access the databases
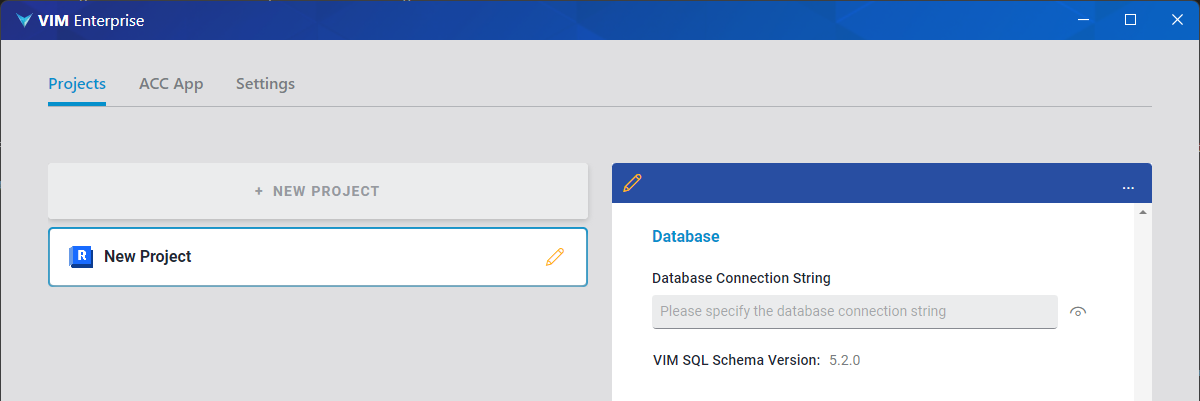
- SQL database — stores the VIM Enterprise project BIM data (excluding the 3D geometry data, which is stored in the VIM file).
A separate database is required for each VIM Enterprise project. It's a good idea to name each database based on the corresponding VIM Enterprise project. Each VIM Enterprise project will require the corresponding SQL database connection string.
If you are not familiar with Microsoft Azure, contact your IT department for assistance or have them complete this procedure for you.
If you want to create a local SQL Server database, see Creating a Local SQL database.
Creating an Azure SQL Server
- Log in to Microsoft Azure and go to your Resource group Home page.
- On the Resource group page, click Create.

- On the Marketplace page type
Azure SQLin the search field and press Enter. - From the search results list, under Azure SQL, click the Create drop-down and choose Azure SQL.
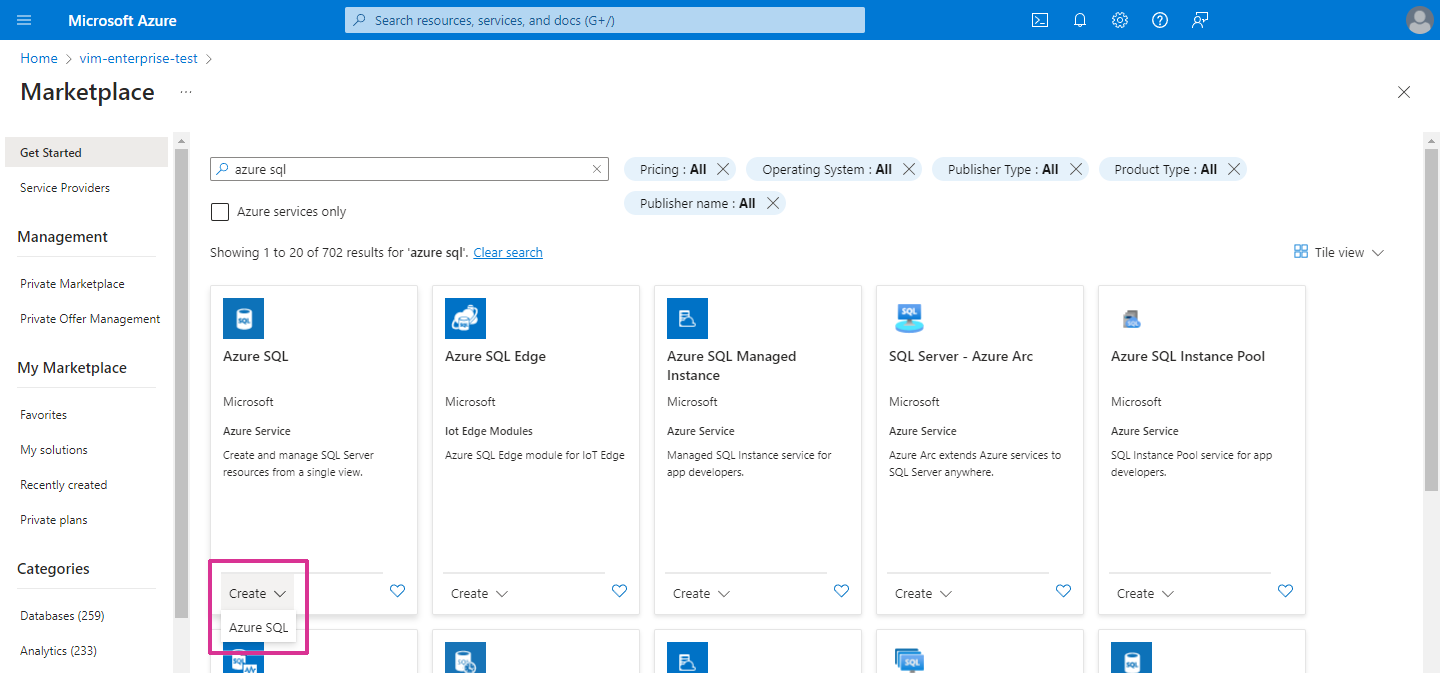
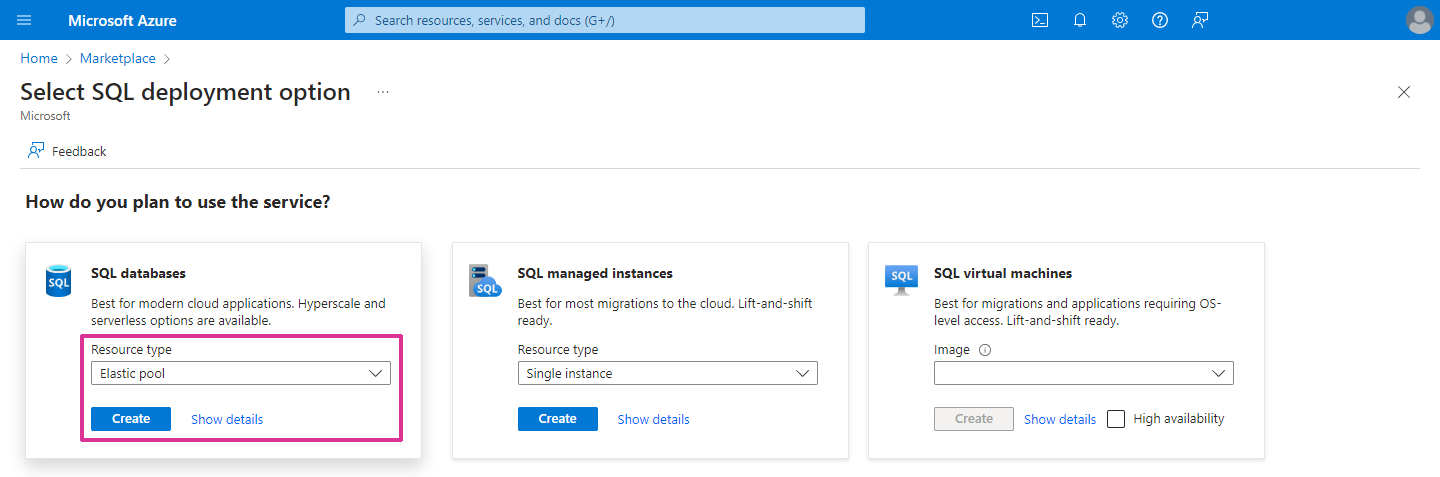
- On the Select SQL deployment option page, in the SQL databases box, click the Resource type field, choose Elastic pool from the drop-down list, and click Create.
Creating an SQL Elastic Pool
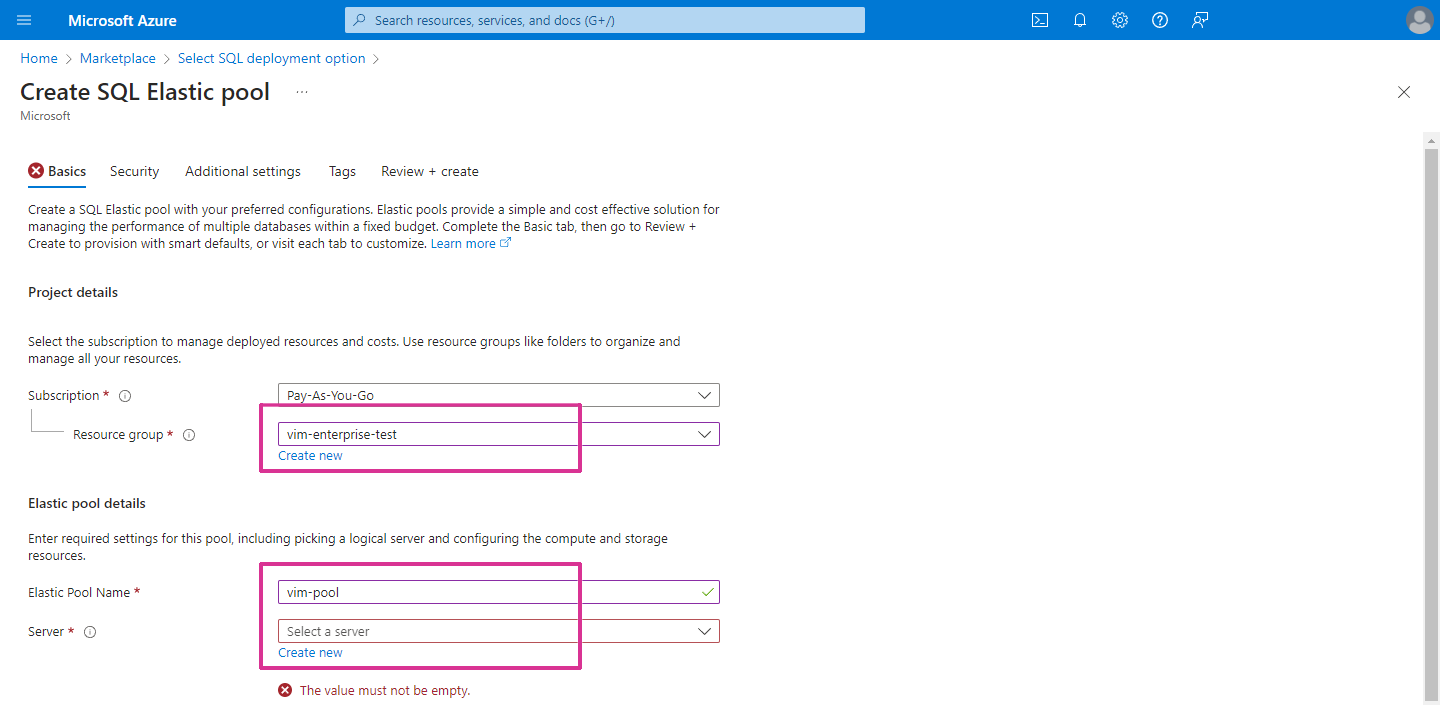
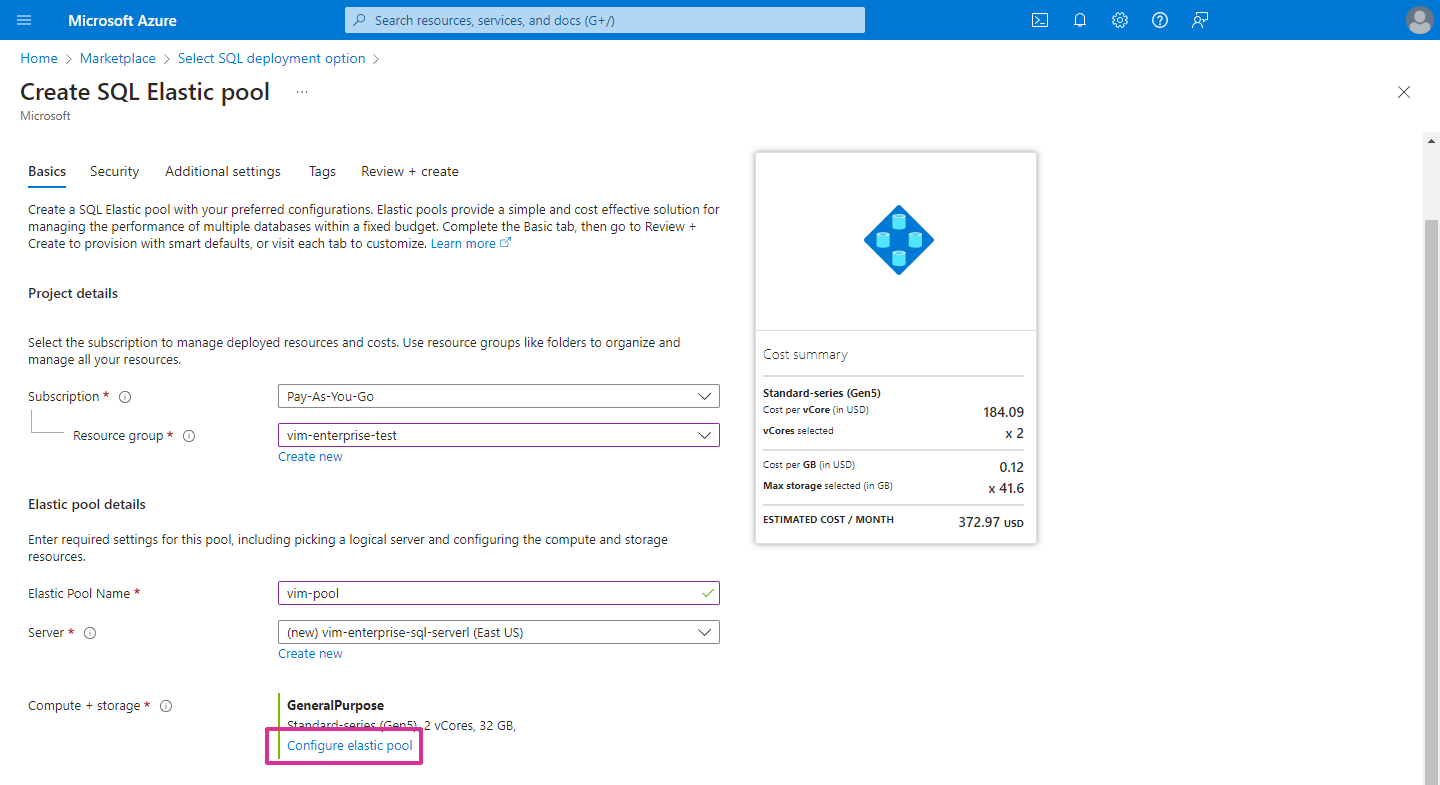
- On the Create SQL Elastic pool page, make sure the correct Resource group is selected (see below).
- In the Elastic pool details section, type a name in the Elastic Pool Name field.
- Below the Server field, click Create new.
- On the Create SQL Database Server page, under Server details, type a name in the Server name field.
- For the Authentication method, select Use SQL authentication, then specify a Server admin login and Password. Make a record of the password. It will be required when you create a VIM Enterprise project.
NOTE: VIM Enterprise currently supports only SQL authentication.
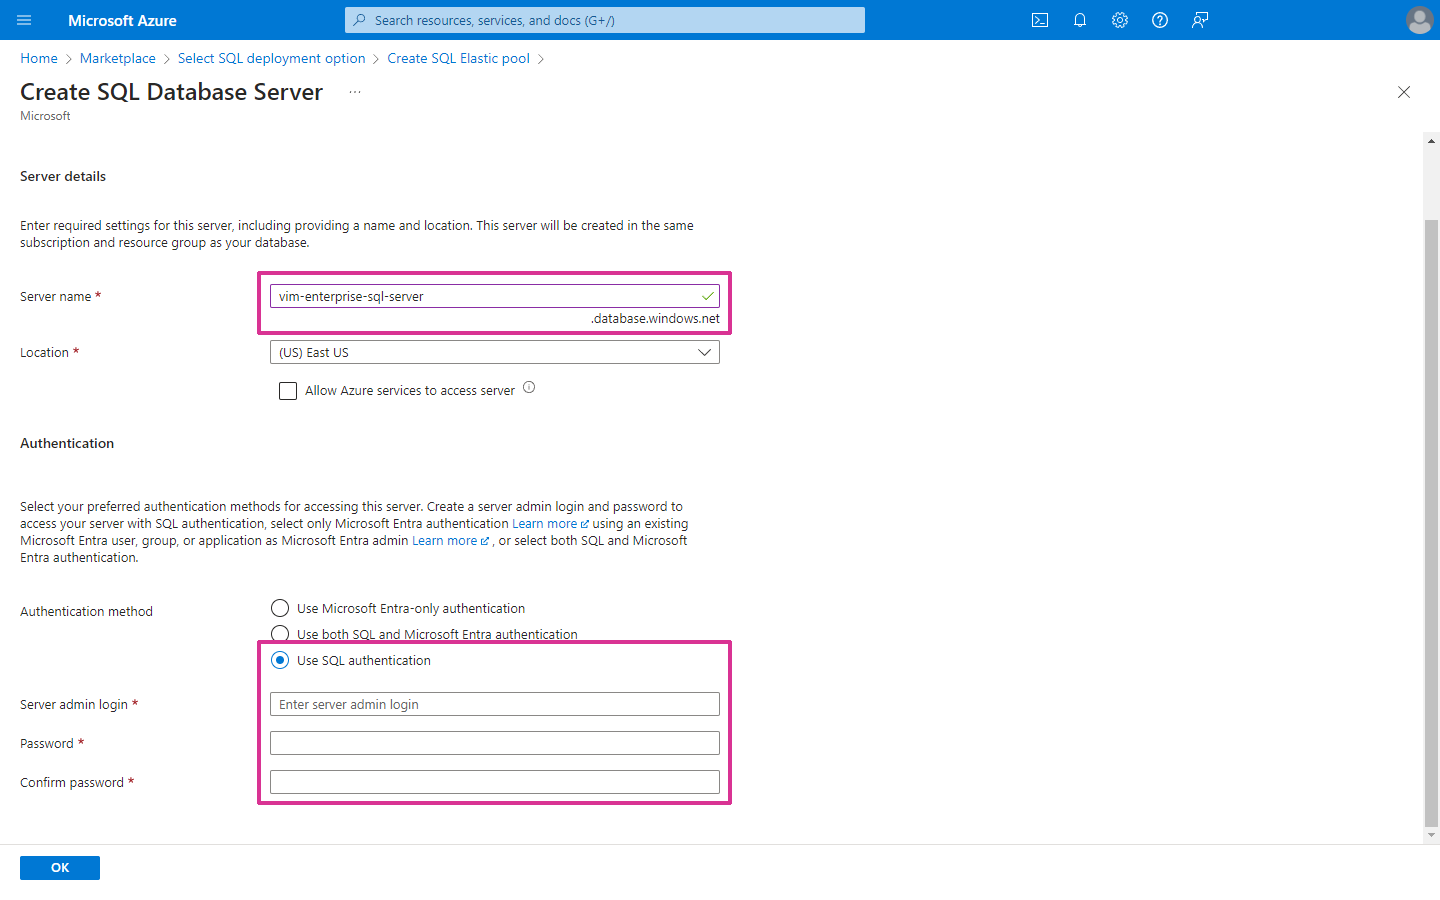
- Click OK.
- On the Create SQL elastic pool page, in the Elastic pool details section, click Configure elastic pool.
- On the Configure page, in the Service and computer tier section, click the Service tier drop-down list and select an option that suits your requirements. For smaller Revit projects the Basic or Standard options should be sufficient. If you are working with larger and more complex projects, choose the option that suits your requirements.
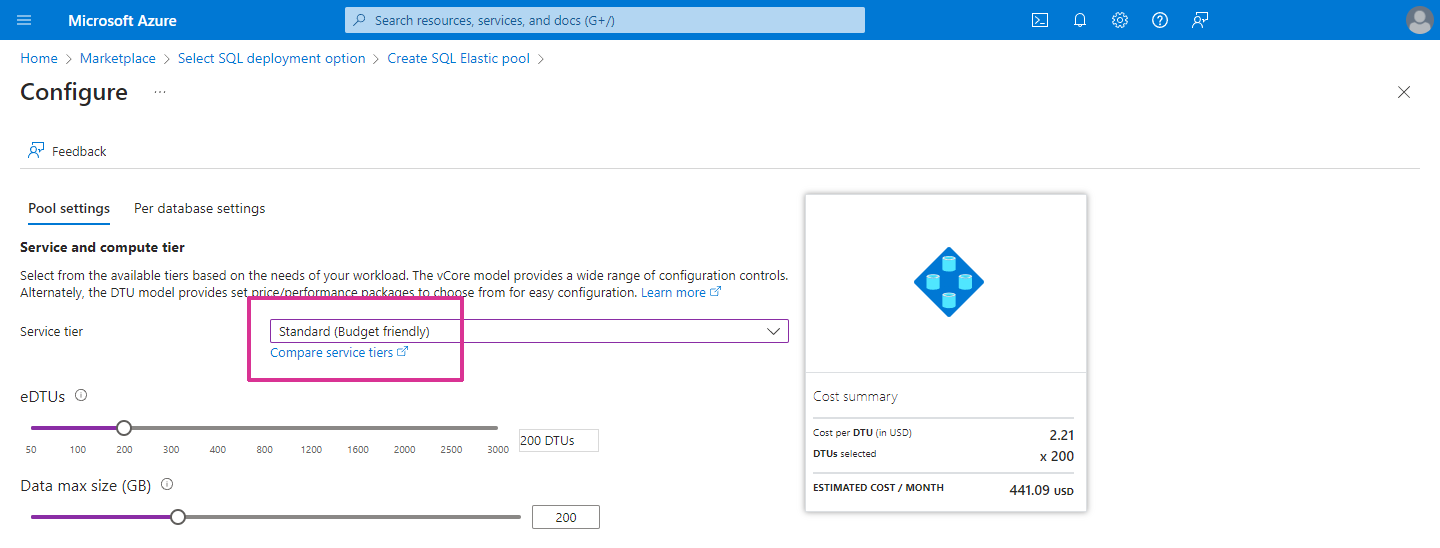
- At the bottom of the Configure page, click Apply.
- On the Create SQL Elastic pool page, review the settings on the other tabs (Security, Additional settings, Tags), and modify the settings based on your IT policies if required.
- Click Review + create, review your settings, and then click Create.
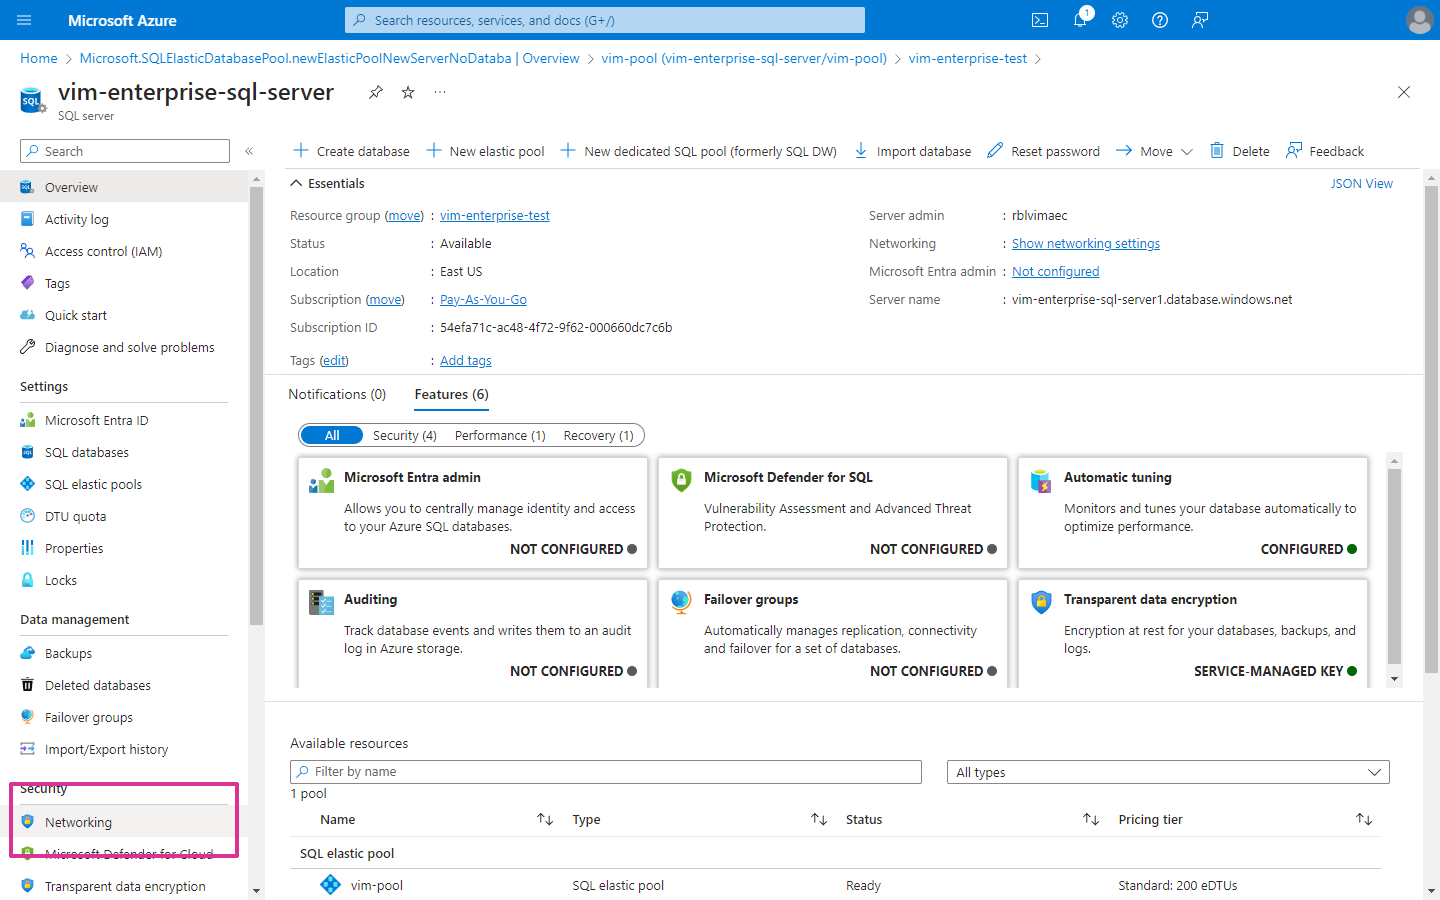
Configuring a Database Firewall
- On the SQL server page, in the left panel under Security, click on Networking.
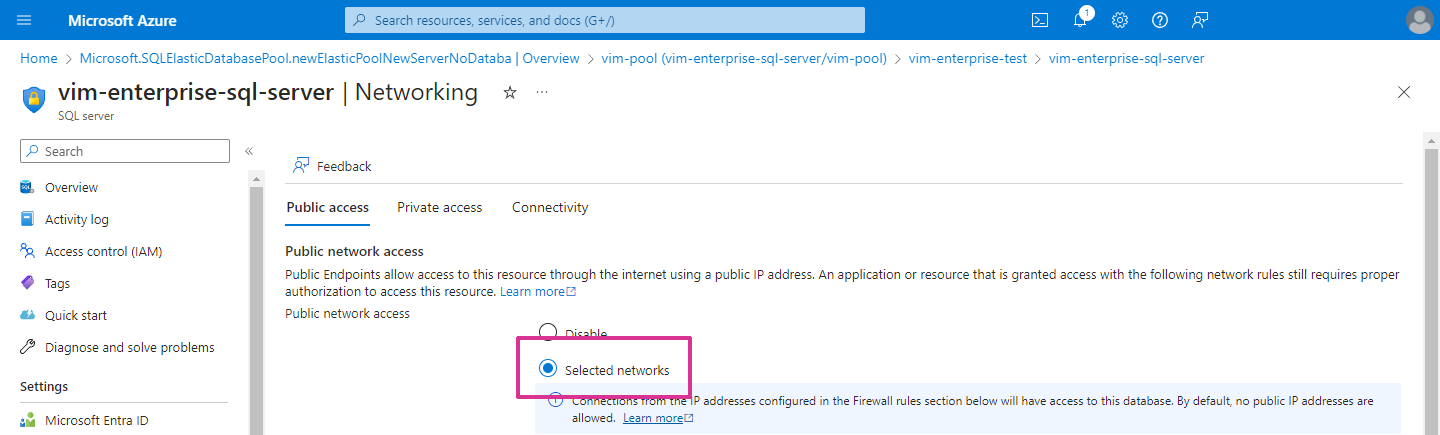
- On the SQL server Networking page, enable the Selected networks option, and confiigure the firewall rules based on your IT policies.
Creating a SQL Database
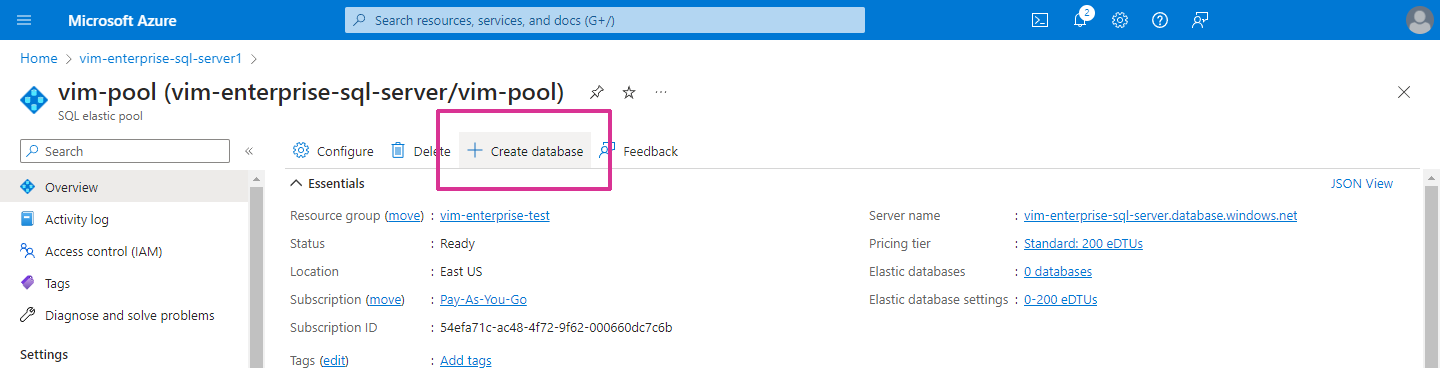
- On the SQL Server page, click on the SQL elastic pool.
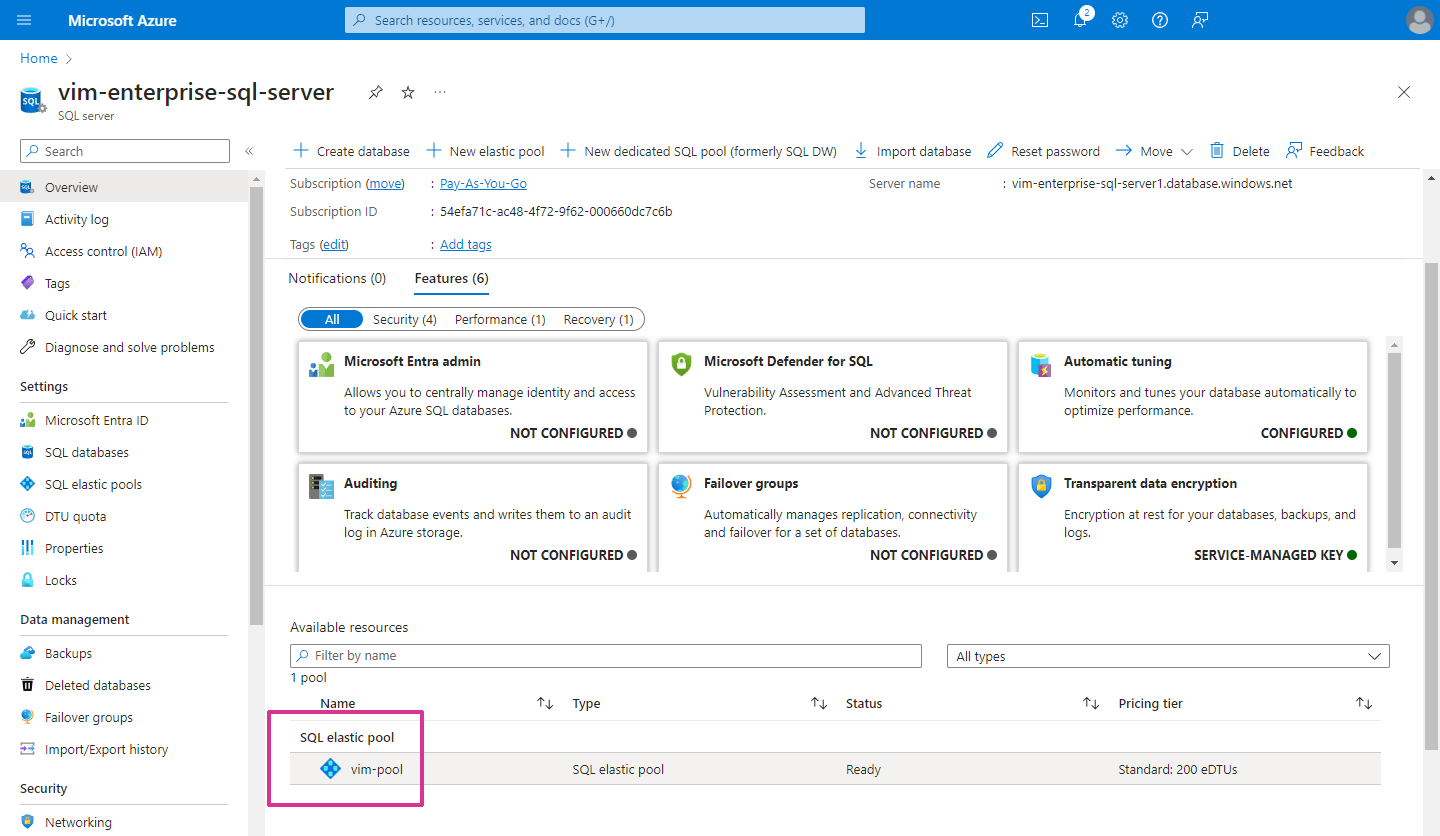
- On the SQL elastic pool page, click Create database.
- On the Create SQL database page, type a Database name and select a Backup storage redundancy option. It's a good idea to name the database based on the corresponding VIM Enterprise project.
- On the Create SQL database page, review the settings on the other tabs (Networking, Security, Additional settings, Tags), and modify the settings based on your IT policies if required.
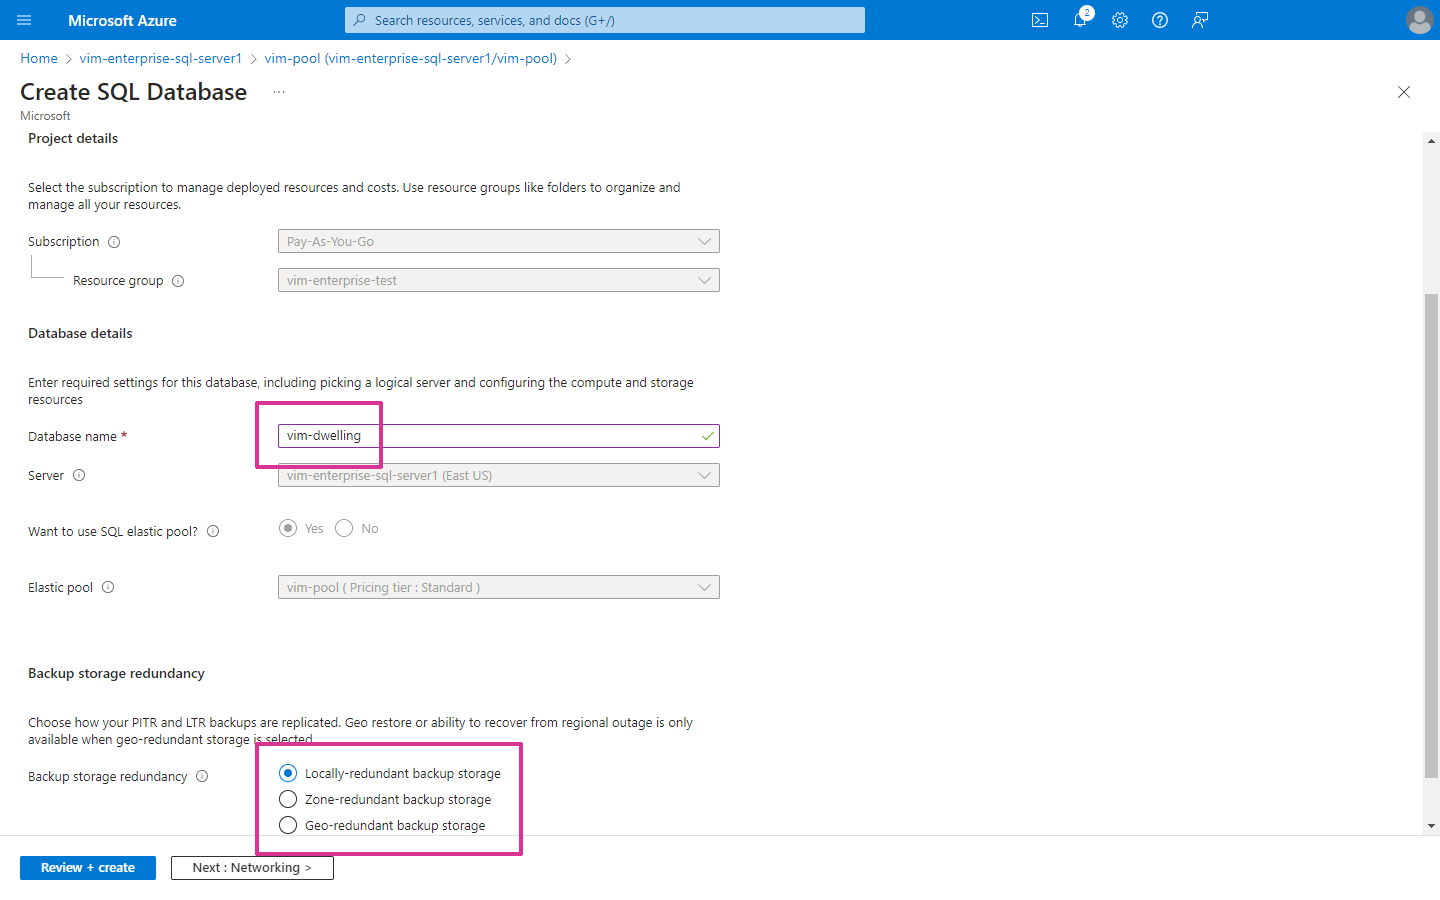
- On the Create SQL database page, click Review + create, review your settings, and then click Create.
- When the deployment is complete, on the Deployment page, click Go to resource.
- On the SQL Database page, in the left panel under Settings, click Connection Strings.

- On the SQL database Connection strings page, in the ADO.NET (SQL authentication) field, click the Copy to clipboard icon in the lower right corner. You need to add this database connection string to the VIM Enterprise project settings, but you must first update the
{your_password}placeholder (underlined text below).
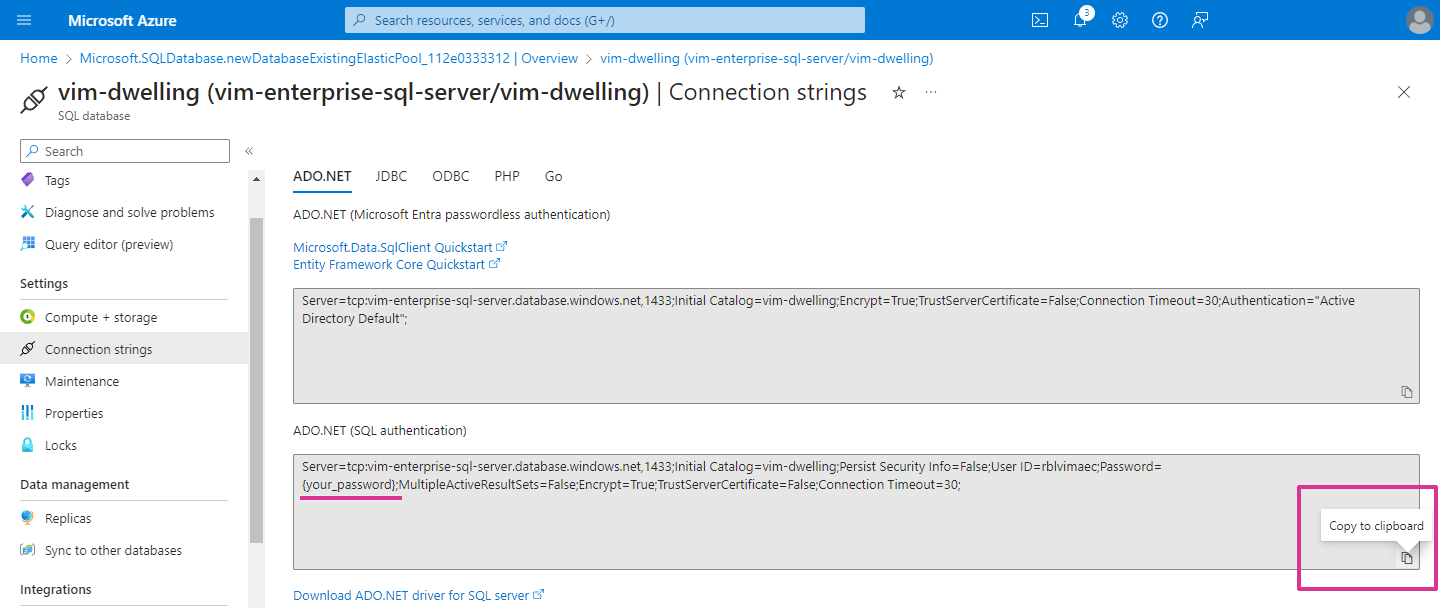
- Paste the text copied from the SQL database Connection strings page into a text editor, replace
{your_password}with the Server admin password you defined in Creating an SQL Elastic Pool. - Copy or save the modified text string so that it can be pasted into the VIM Enterprise project settings.
A separate database is required for each VIM Enterprise project. To create additional databases, you only need to repeat the steps in this last section (Creating an Azure SQL Database).