Managing VIM Cloud Organizations
When you create a VIM Cloud account, you will be prompted to choose your plan and create an organization. VIM Cloud organizations enable you to create projects and reports and share them with other team members.
There are two types of users within an organization:
- Admin users have full access to the organization, including the organization's billing and settings.
- Members can create and manage projects and reports.
Adding Users to an Organization
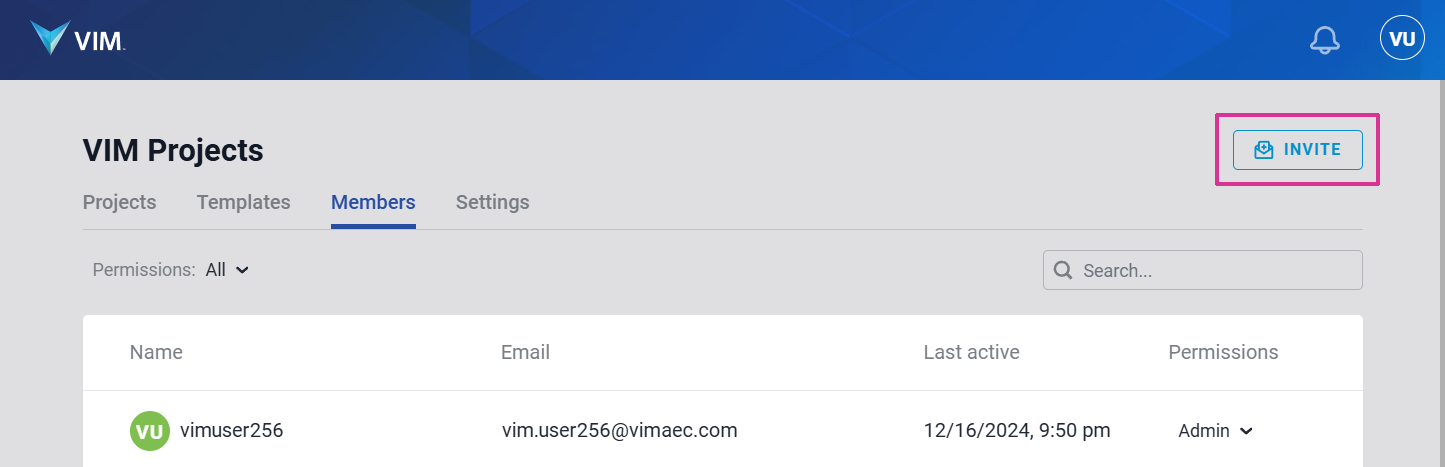
To add Members to an organization, go to the Members tab.
- On the VIM Cloud dashboard, go to the Members tab.
- Click Invite at the top-right of the panel.
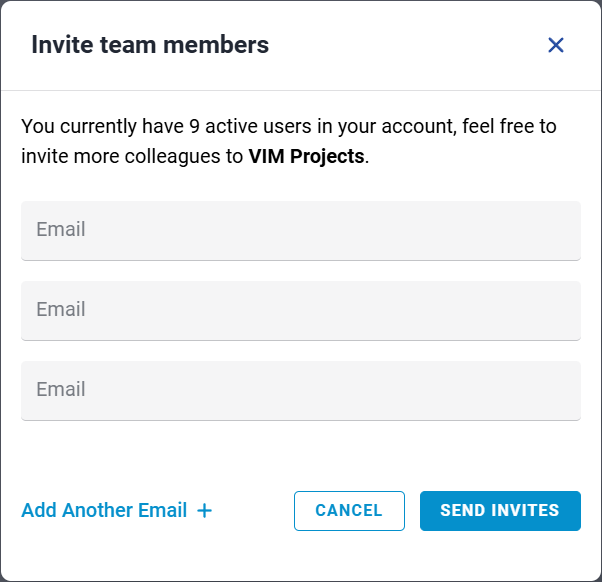
- In the Invite Team Members dialog, add the email address(es) of those you want to add to your organization. Depending on the number of seats available in your plan, you can add additional emails by clicking Add Another Email.
- Click Send Invites. Email invitations will be sent to each of the email addresses you entered.
Accepting an Invitation
If you receive an email inviting you to join an organization and are new to VIM Cloud, complete the steps below. If you already have a VIM Cloud account, you can change organizations from the the Profile icon at the top-right of the VIM Cloud Dashboard, under Your Organizations.
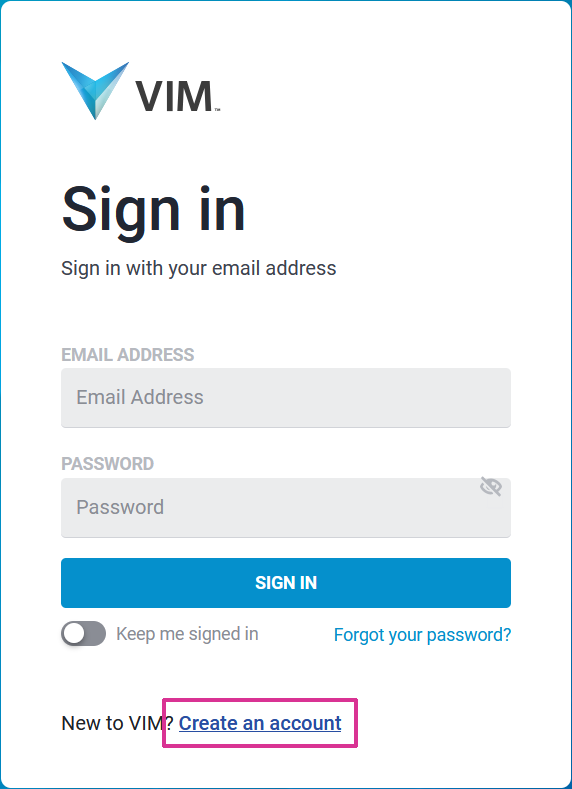
- In the email you received, click Accept Invitation.
- In the VIM Sign In dialog, click on Create an account.
- In the Create your account dialog, type your Email Address and then click Verify Email. A verification code will be sent to your email address.
- In the Create your account dialog, verify your Email Address is correct, type the Verification Code that was sent to your email account, and then click Verify Code.
- In the Create your account dialog, type a New Password, type your password again in the Confirm New Password field, and then click Create.
Leaving an Organization
- On the VIM Cloud dashboard, click the Profile icon at the top-right and choose Account Settings.
- In the account settings dialog, go to the Organizations panel.
- Click Leave beside the organization from which you want to leave.
- In the Leave the organization dialog, type the Organization Name, and then click Confirm.
Adding a New Organization
To create another organization, click on the profile icon at the top-right and choose "Create new organization"