Updating a VIM Power BI Report
On this page, we cover how to update a VIM Power BI report.
To complete the instructions on this page, please ensure that you have completed the following:
-
✅ Configure the "Parquet" section in your VIM Enterprise project.
-
✅ Configure the "Azure Blob Storage" section in your VIM Enterprise project.
-
✅ Successfully run your VIM Enterprise project to completion.
-
✅ Contact your IT staff to obtain an "Access Key" to the Azure Storage Account you used in your VIM Enterprise project. This key is required to authenticate Power BI with your Azure Storage Account.
Starting Fresh in Power BI Desktop
Please follow the steps below to update your VIM Power BI report in Power BI Desktop.
-
Open VIM Enterprise and scroll down to your project's "Power BI" section. Keep it open; we'll come back to this later.
-
Open the folder where you extracted the VIM Enterprise Installer Package.
-
You can download the .zip package here.
-
Once downloaded, extract it anywhere on your filesystem.
-
-
Copy the VIM Power BI report template (.pbix).
- This file should look like: "BimAudit-RVT-PRQ5.6.0.e-U6.0.0-DM1.0.0.pbix"
-
Paste the .pbix file anywhere on your filesystem and rename it. We recommend naming it based on your project name.
-
Open your newly copied .pbix file in Power BI Desktop. By default, you should see the sample residence.
-
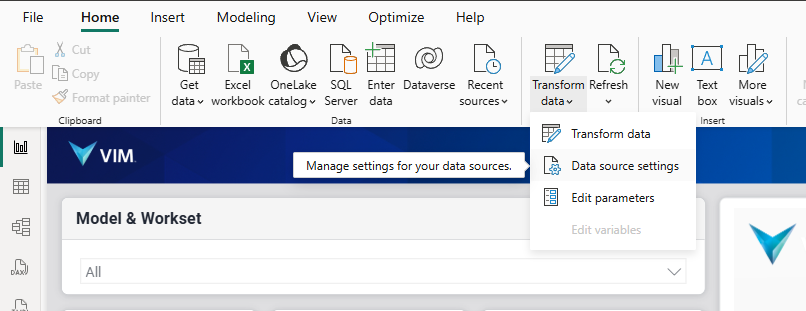
Click on the dropdown arrow under "Transform Data" and select "Data Source settings"
-
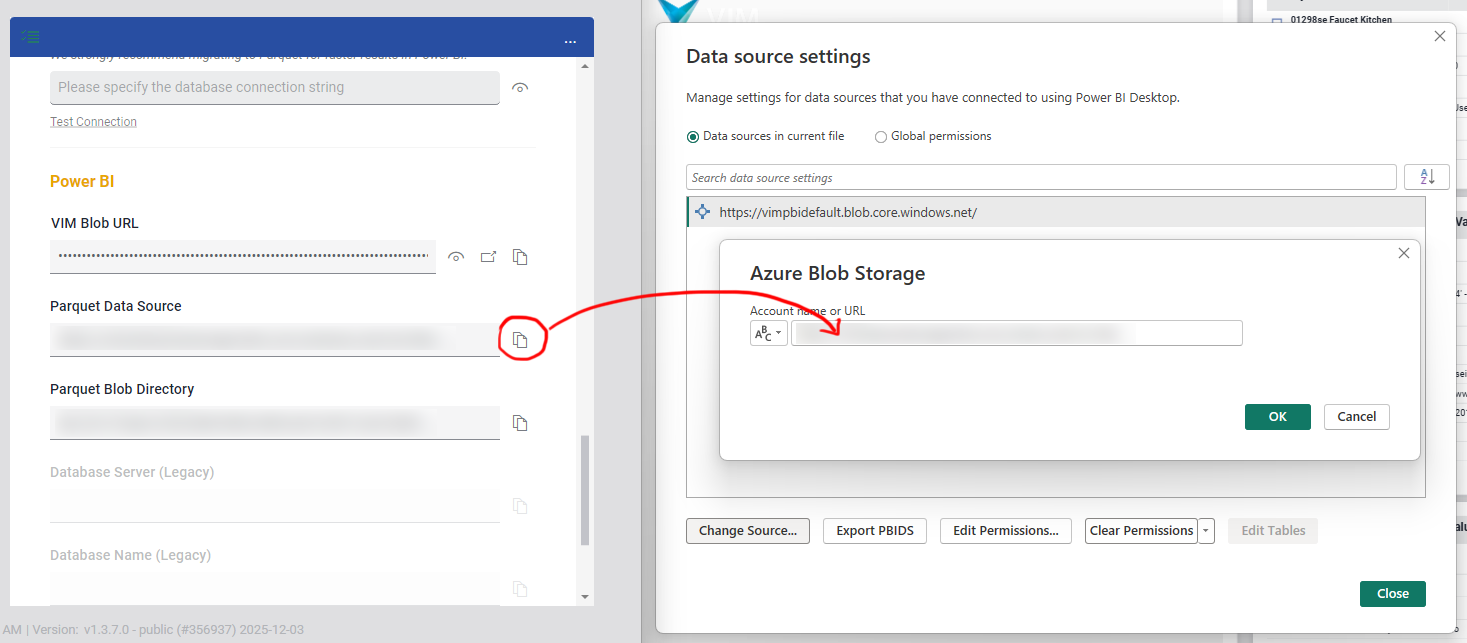
Select the default storage account in the template and click on "Change Source..."

-
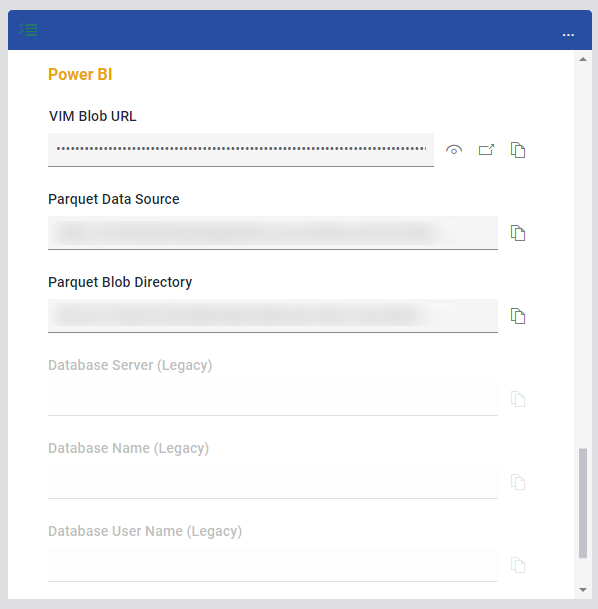
Copy the "Parquet Data Source" from VIM Enterprise and paste it into the Power BI dialog then press "OK"
-
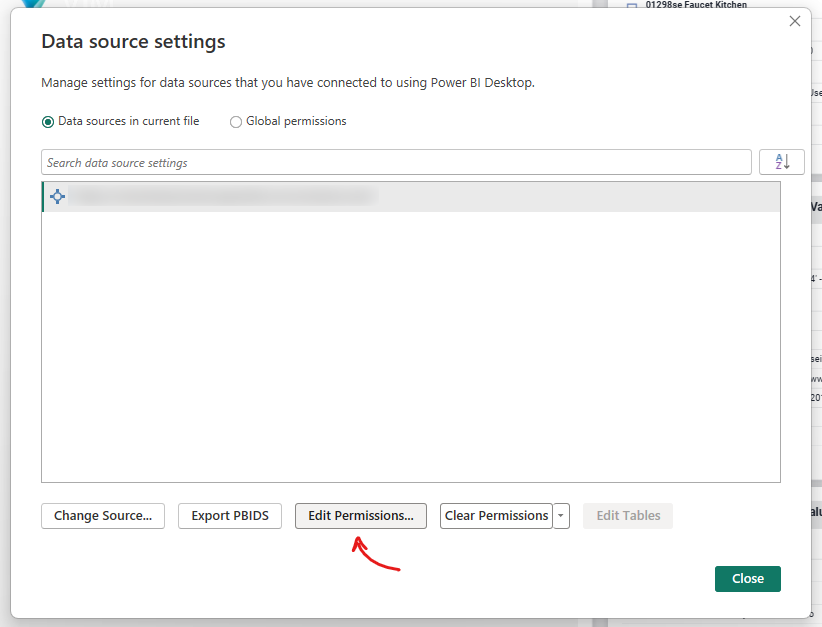
Click on "Edit Permissions..."
-
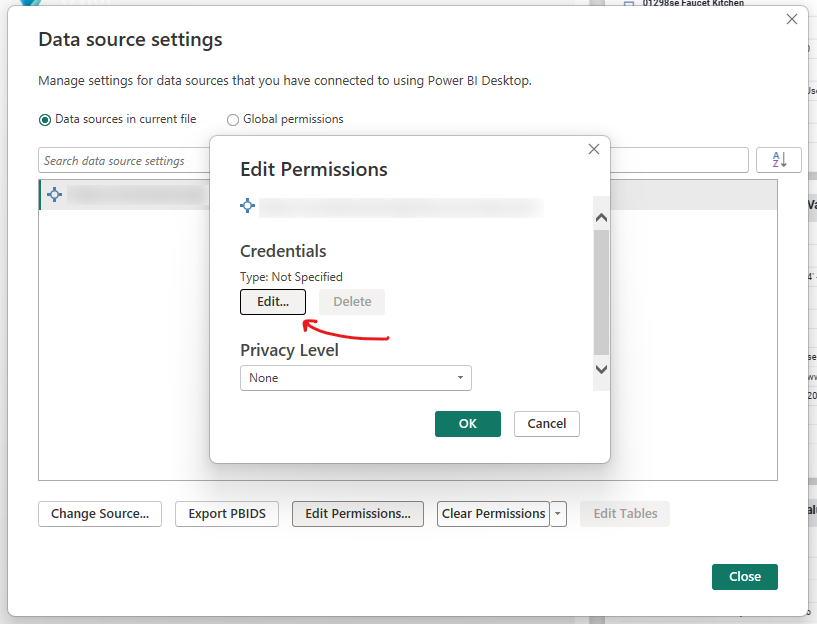
In the "Edit Permissions" dialog, press "Edit..."
-
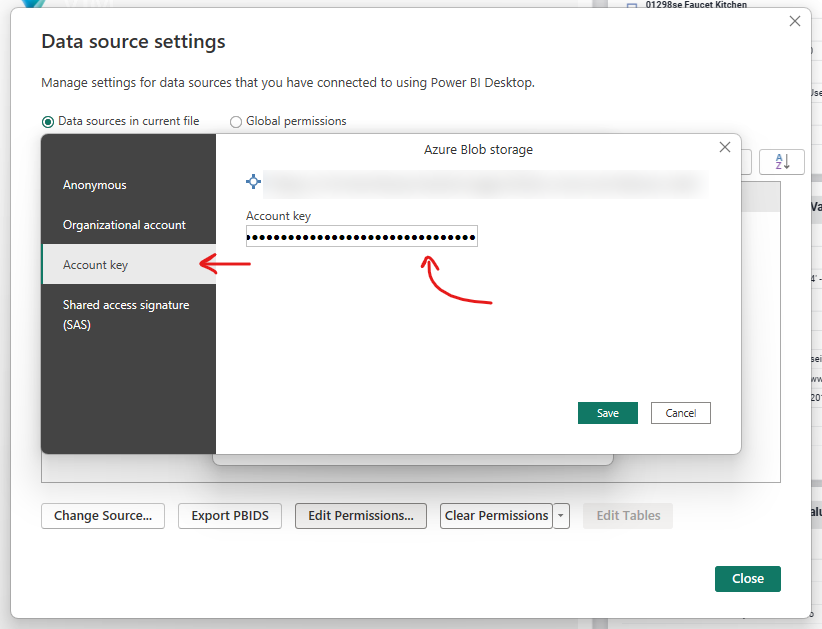
Use the "Account key" tab and paste the Account key for your Azure Storage Account then press "Save". Please follow this short guide to obtain this key.
 note
noteYou only need to specify this Account key once; Power BI will remember it in subsequent reports which also use this Azure Storage Account as a data source.
-
Press "OK" to exit the "Edit Permissions" dialog.
-
Press "Close" to exit the "Data source settings" dialog.
-
⚠️ Don't press "Apply changes" yet! There is one last step.
-
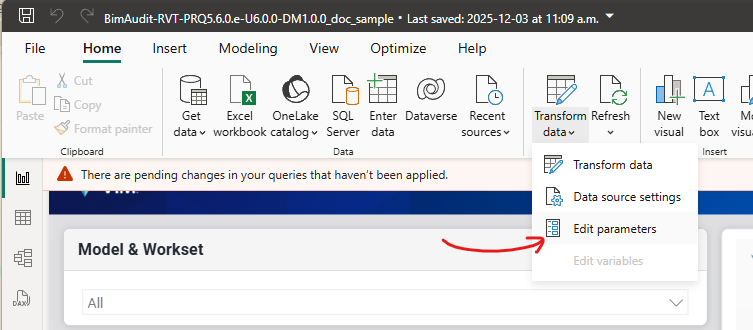
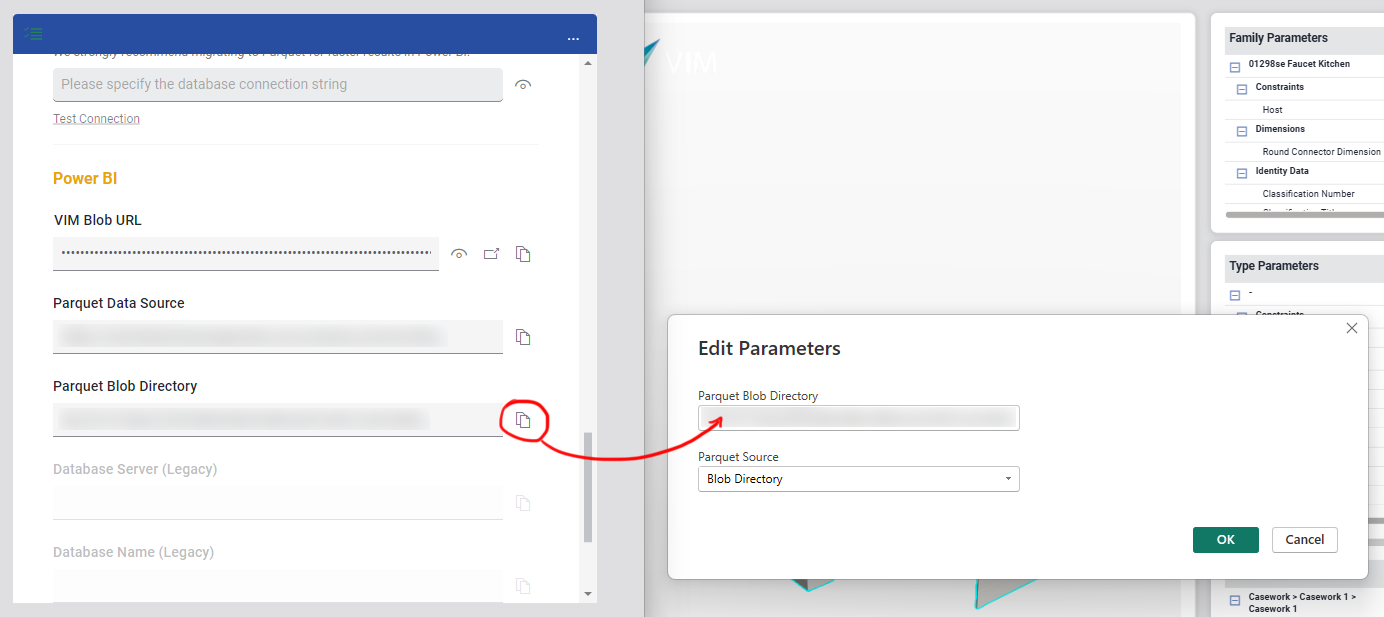
Click on the dropdown arrow under "Transform Data" and select "Edit Parameters"
-
Copy the "Parquet Blob Directory" from VIM Enterprise and paste it into the Power BI dialog then press "OK"
-
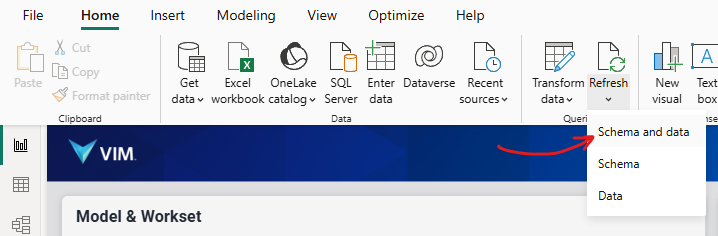
Click on the dropdown arrow under "Refresh" and select "Schema and data" to completely refresh the data in the report.
-
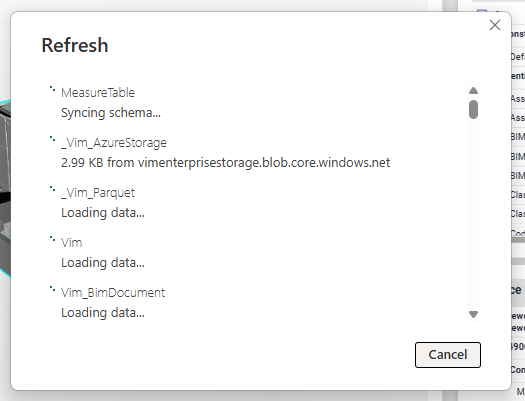
The following dialog will be shown while Power BI processes the new data.
-
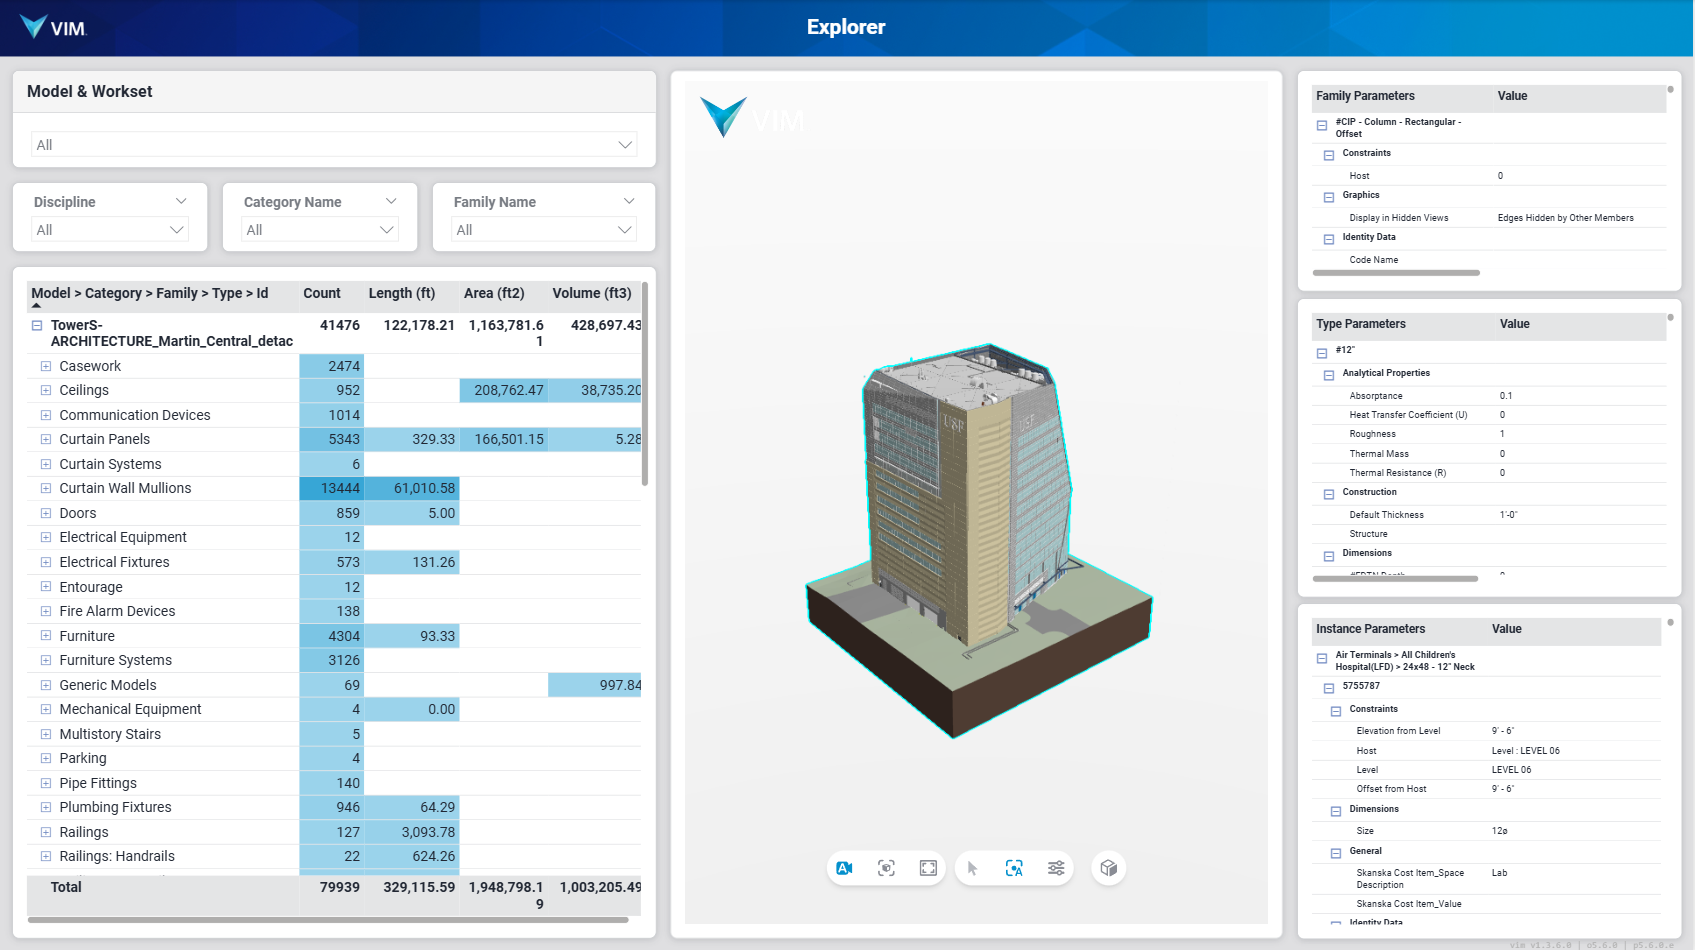
When the refresh completes, switch report pages to refresh the VIM viewport with your latest data.
-
✅ Your report has been successfully updated!
-
You can now publish this report to share it with your peers.